Sirui EPC-10K

Today, I have for you guys an exclusive first look at an upcoming product from Sirui and it is the EPC-10K.

This was sent to me directly from Sirui Europe free of charge for review purposes. I have not been instructed to say anything in particular about it so all opinions expressed will be my own.

The EPC-10K arrived without any packaging and there is no information for it listed anywhere yet because it is not yet for sale. I received a pre-production unit but was told that the one I received is representative of the final product. The EPC-10K is expected to be available starting September 1, 2019 for $149.90. If there are any updates to the product after the official release, I’ll make sure to update the information in this write up.

When I first saw images for the EPC-10K, I said to myself “Wait, this looks really familiar.”

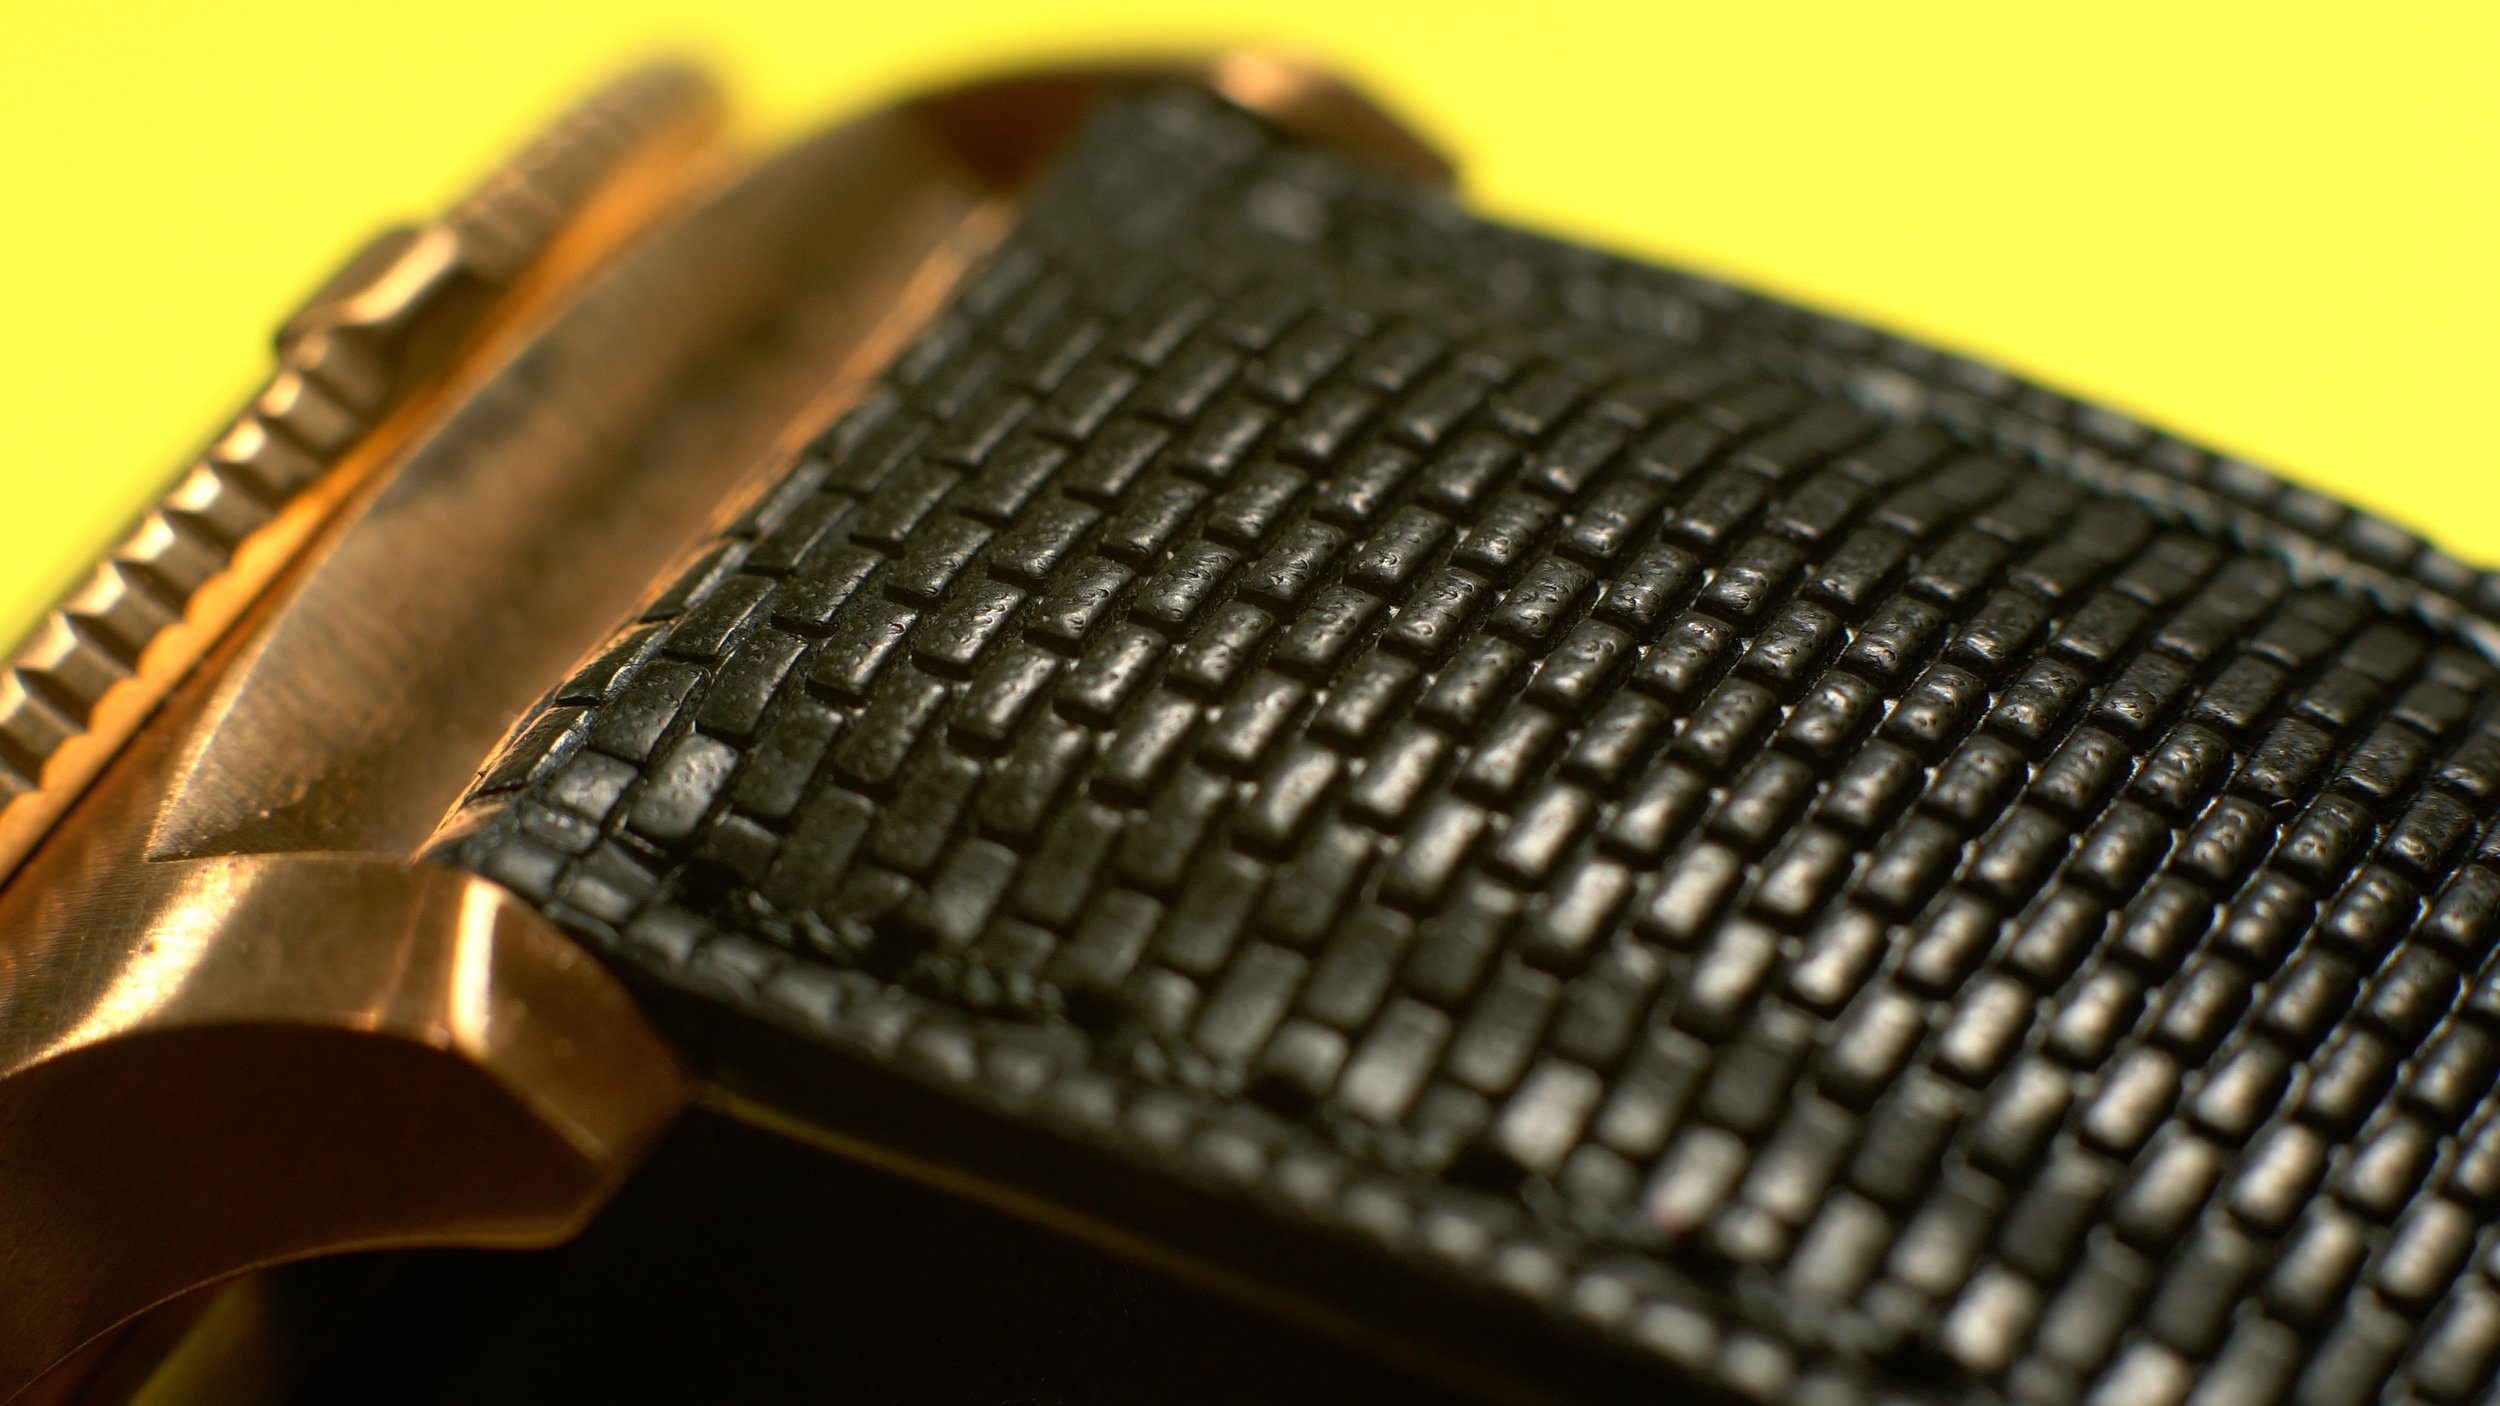
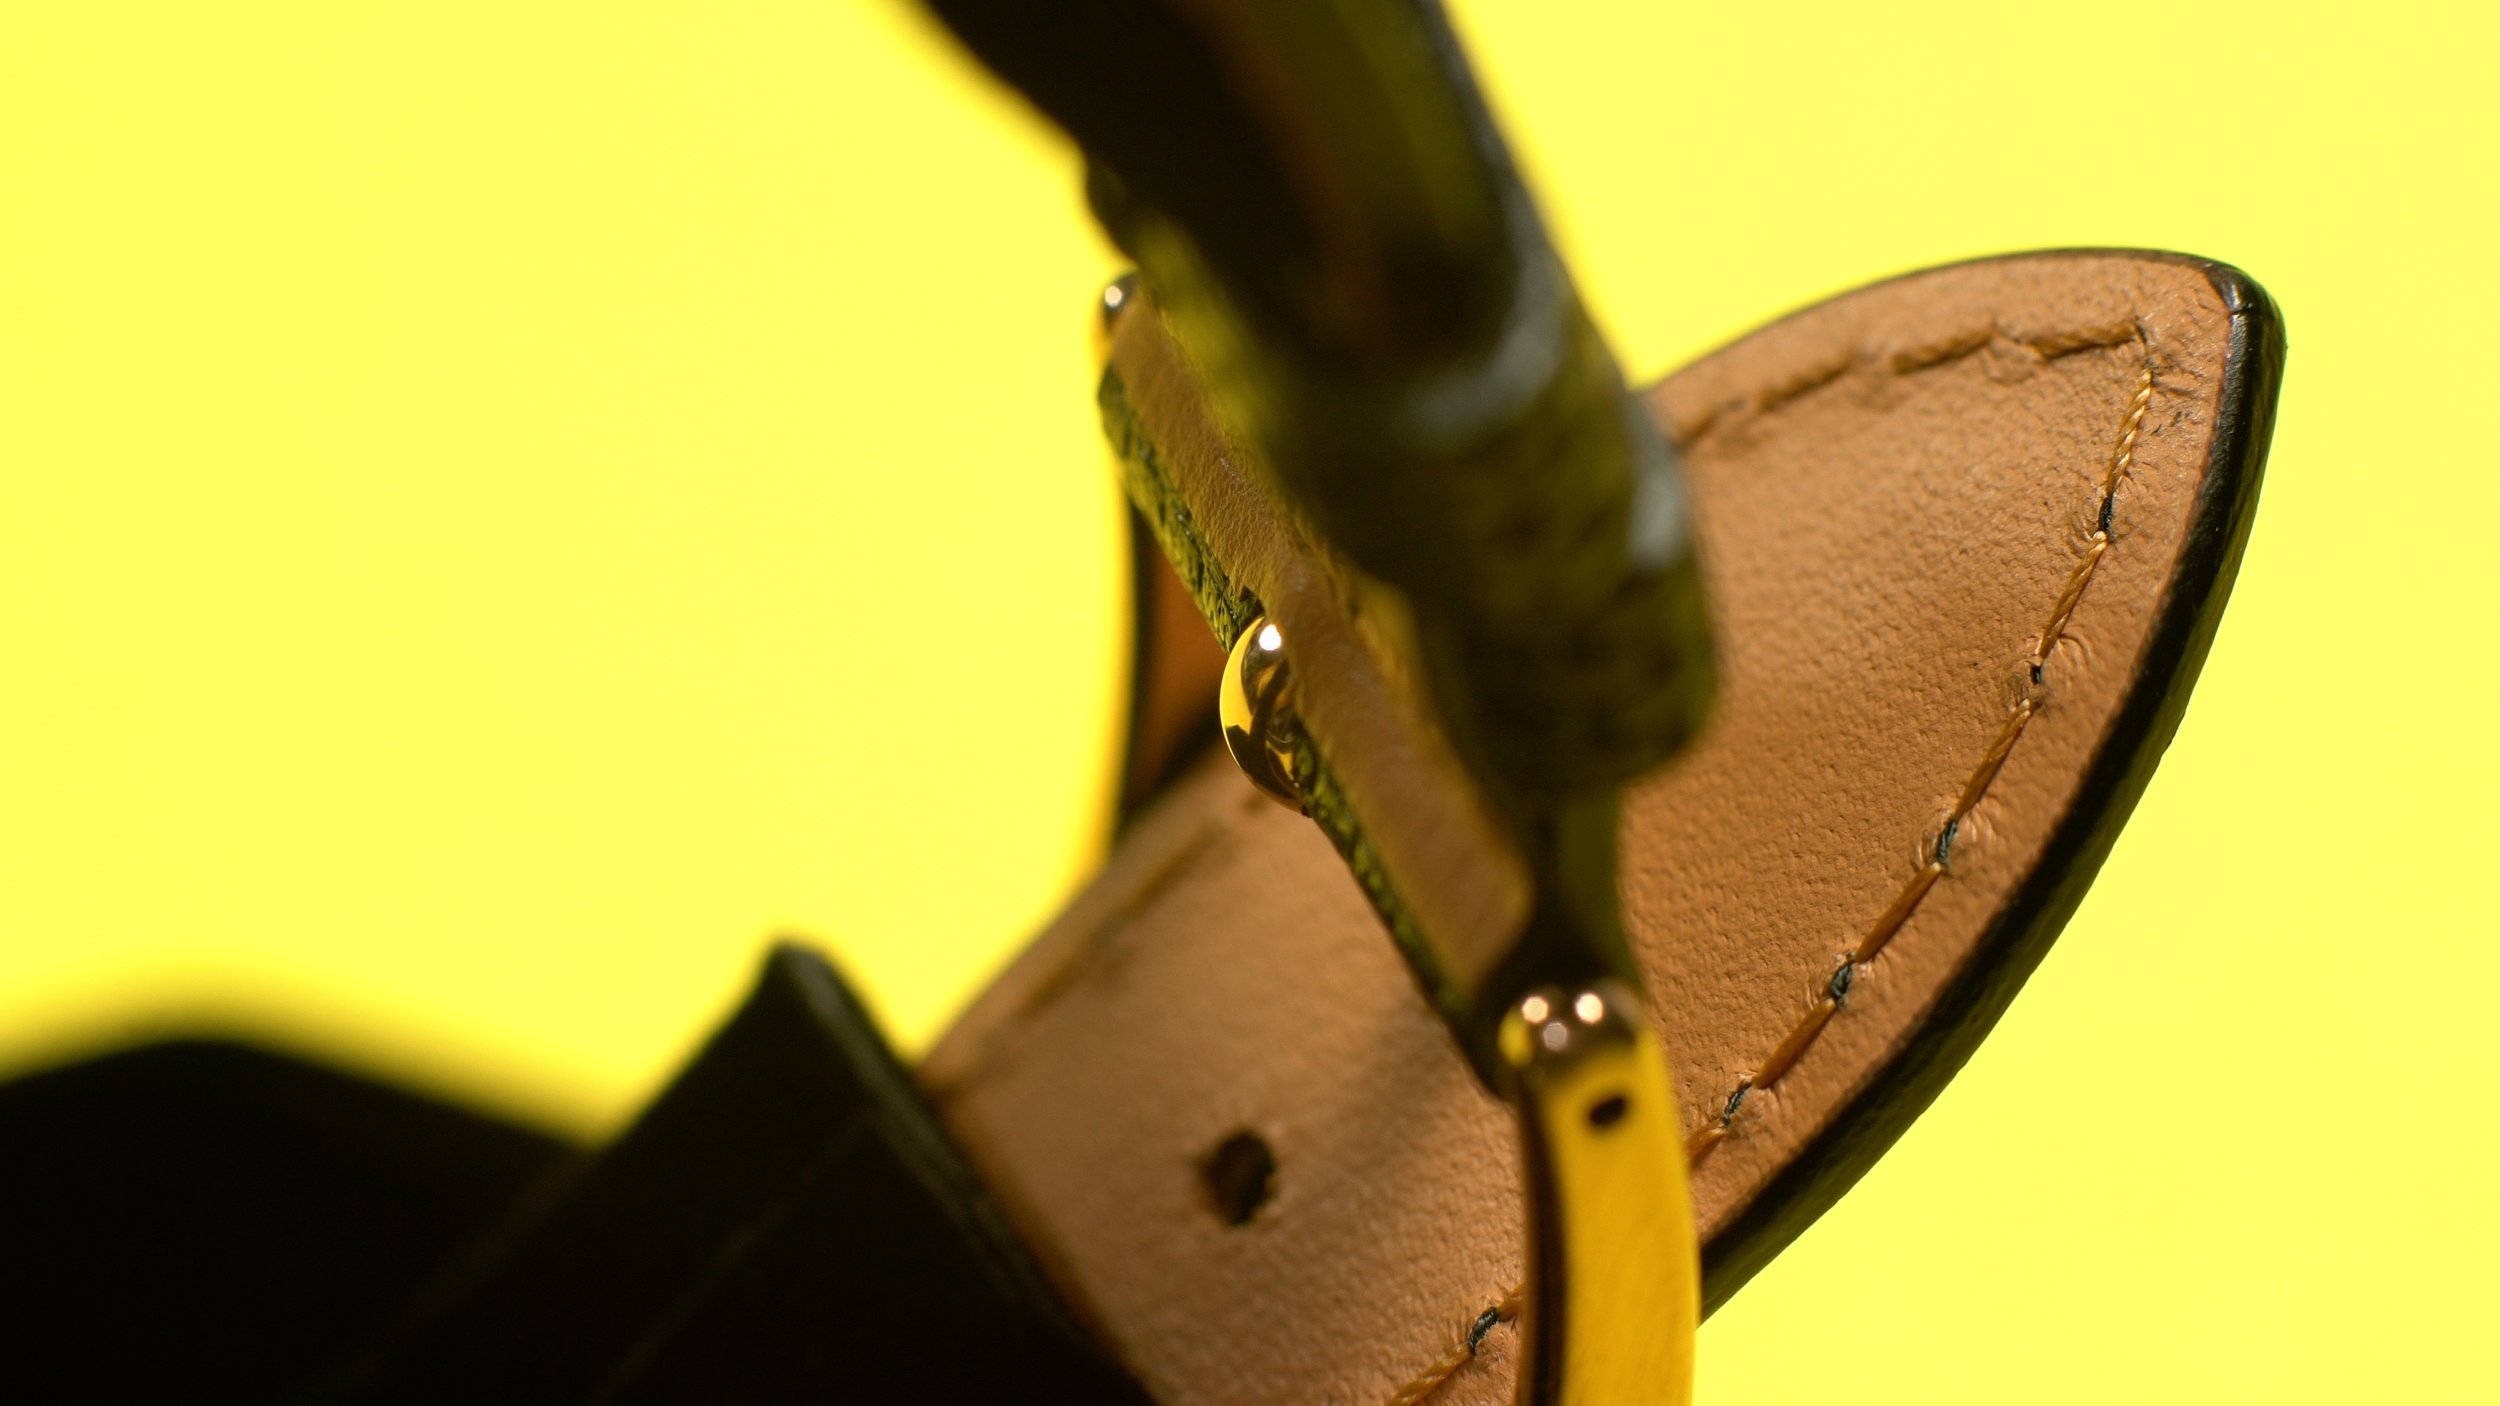
Take a look at the Sirui EP-204S. This is the monopod that I most often use, but just look at its feet. Very familiar right? That’s because the feet of the EPC-10K is of the same design as the one used for the EP-204S and a few other Sirui monopods.

Prior to receiving the EPC-10K, this is something that I’ve already done in the past. When I needed a table top tripod, I just took the legs of my EP-204S and threw a ballhead on it. The EPC-10K just comes with a better fitting ballhead.

Although there are no released specs for the EPC-10K yet, I do have the specs for the individual parts and we can make some very good assumptions.

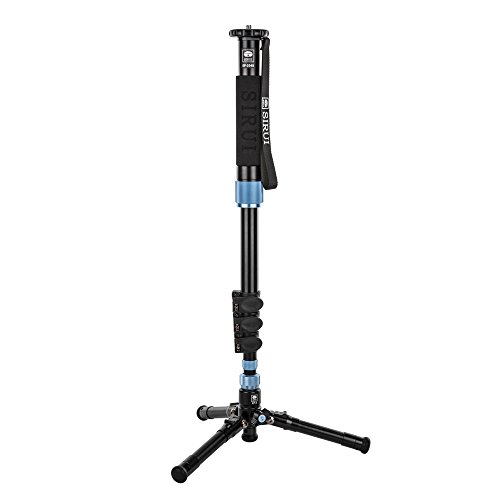
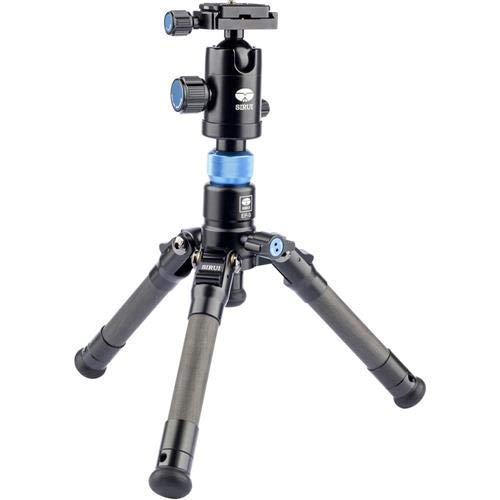
First, the EP-224ST table top tripod. These legs feature a carbon fiber, one section leg design. The legs span from a minimum height of 210mm/8.27in to a maximum height of 285mm/11.22in. The legs can be utilized at 2 different angles and can be adjusted by releasing the leg lock button. The legs by themselves weigh 0.43kg/0.95lb but can hold a max load of 8kg/17.64lb.

Screen Shot 2019-08-19 at 9.26.42 PM.png

When it comes to features, the EP-224ST is a bit more unique than most table top tripods. Again, these legs were originally intended to be used with a video monopod so we get the various features that that entails. The most interesting thing about these legs are the inclusion of the leveling base. Once the security knob and ball locking knob is released, the upper section of these legs act like the leveling base of a video tripod. You can move the stem and achieve different angles much easier than if you were to adjust the tripod legs. This is very useful for leveling out those horizons. The base can also help you achieve some simple camera movements that may not be as stable if you were to handhold.

Screen Shot 2019-08-19 at 9.23.16 PM.png

Next, we have the Sirui CS-10 ballhead. This head measures in at 88mm/3.5in, weighs 0.22kg/0.49lb and has a max load of 13kg/28.7lb. In terms of features, this is a pretty standard ballhead. It utilizes an arca swiss plate system that is accessible by a locking knob and security pin. The main ball and panning base are held in place with two other locking knobs.

To get the final specs of the EPC-10K, we just combine the specs of the EP-224ST legs and the CS-10 head.

  • Minimum Height - 298mm/11.77in

  • Maximum Height - 373mm/14.72in

  • Weight - 0.65kg/1.44lb

  • Max Load - 8kg/17.64lb


You may have noticed that the max load did not change from that of the EP-224ST. While the CS-10 can hold 13kg/28.7lb, the EP-224ST can only 8kg/17.64lb. With a tripod setup, you have to consider the final product as only as capable as its weakest components. In this case, although the head can hold more weight, the legs are not recommended for such weights. Pushing the head to its limits while using these legs may damage the legs and cause total failure, which may result in damaging your camera gear.

This is where this setup surprises me. Typically, the head will be the weak point of a tripod. The legs can typically hold much more than the head. In either case, this seems like a case of missed opportunity. Either make the legs sturdier so I can take advantage of this head’s full potential or give me a head that is more in line with the legs and maybe drop the price a little. Having the head being able to hold almost twice as much as the legs really doesn’t mean anything unless you want to push the limits.

Overall, I would have to say that as a table/mini tripod, this product does very well. That being said, there are a few things that I don’t like about it.

First, I just don’t like the aesthetics of the tripod. This is essentially Sirui using scrap parts to make something new. Because of this, the head doesn’t exactly fit flawlessly with the legs. Had everything been made for each other, the connection between head and leg would be more streamline and not have excessive ridges or gaps. To me, this looks a bit janky and I don’t like it. But again, it functions as it’s suppose to and it does it very well. Like I said, this is something that I myself have done in the past with the EP-204S legs and my own tripod head, but it’s just not pretty. Also, had everything been made for each other, maybe we would have a product with specifications (max load) that fall in line more so with each other.

My second complaint with this product is just that it’s confusing. I’m not sure why this thing exists. Sure, Sirui had the parts around so might as well throw it together to get another revenue stream but I think that this could’ve been implemented better. Again, these are the legs from a video monopod. The adjustable leveling base is to help video shooters get a leveled composition much faster. However, for photography, there is little use for this because the setup comes with a ballhead. The ballhead is much simpler and faster to use than the base. To me, the only big use for a leveling base during photography is for shooting panoramas. But because this is such a short tripod and if you want to shoot panoramas with it, you’d likely always be getting a ground level parorama. This tripod would primarily only give you one look. A better use for these legs would be for video like it was designed for. I think that Sirui should’ve brought this product out with a small, compact fluid head. That would’ve paired real well with these legs and, sure, a table top fluid head tripod would be a niche product, but I guarantee that there would be a market for it.

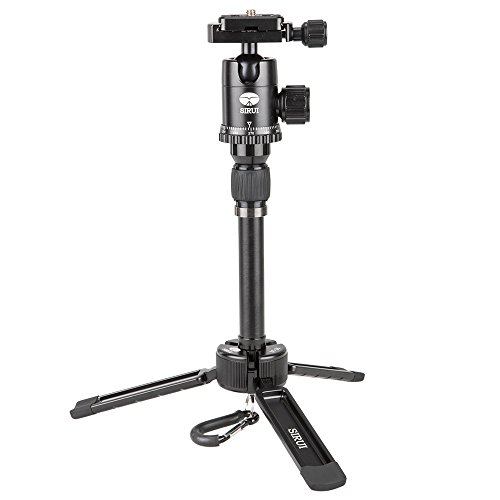
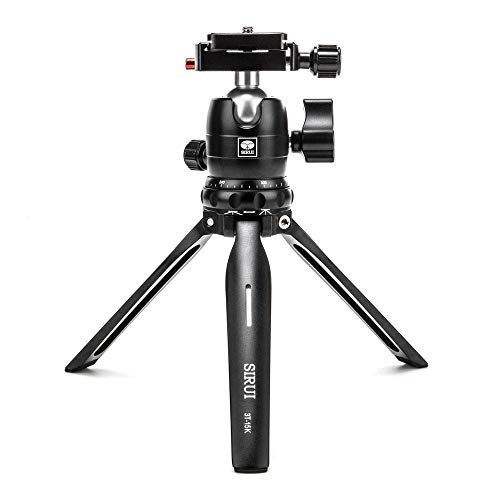
Some of you may be reading this and be thinking that this would make a good vlogging tripod. You can attach a camera and use the tripod as a makeshift selfie stick to get a wider shot and the legs allow you to put the camera down. This seems like it would be a good run and run setup but for those interested in doing this, let me point out a few things. First, this is a pretty unergonomic setup for handholding. The way that the legs themselves are orientated make the entire lower section pretty wide so unless you have some pretty big hands, it will be uncomfortable to hold the tripod over time. Another issue with the legs is that they never fold up evenly unless you spend some extra time to really try to achieve this. When you try to collapse the legs together, they’re typically lopsided and this just adds to the unergonomic grip. Again, you can spend the time to adjust this but imagine doing this every time you try to grip the legs. It’s just a lot of wasted time. You can definitely use EPC-10K as a vlogging tripod, but I just really don’t think that it’s optimized for it. Check out Sirui’s 3T-15 or 3T-35K which are two superior vlogging tripod options.

At the end of the day, had Sirui not sent me this item, I honestly would not buy it. That sounds bad but this is simply because I already have the legs from the EP-204S and can just throw my own ballhead on there and make my own version of the EPC-10K, like I have in the past. For those who own a similar monopod with a similar set of legs, I would suggest you do the same. I wouldn’t spend the extra money just to buy this setup for the extra head. However, if you don’t have the legs already and are really considering this option then I would’nt mind recommending it. This is a very stable tripod and although I don’t think that this is the ideal package, the minor features can come in handy sometimes. This is an interesting product and worth checking out.


If you're considering on buying any of the products mentioned, please support my work by using the links below.

Sirui EPC10K https://amzn.to/2LeSW1p

Sirui EP-204S https://amzn.to/2KWdPNw

Sirui 3T-15K https://amzn.to/2Zl20W5

Sirui 3T-35 https://amzn.to/2ZdnkNj


Want to support my work?

Consider visiting the shop and buying "Absolutely Nothing"
https://www.HaiHoangTran.com/shop/absolutely-nothing

or

Become a Patron!
https://www.patreon.com/HaiHoangTran

or

PayPal
https://www.PayPal.me/HaiHoangTran

OVERHYPED | Zhiyun Crane M2

I was recently sent the Zhiyun Crane M2 for review. This is an electronic gimbal meant to help you get more stable footage. This gimbal is smaller and lighter weight so it’s meant to be used with smaller cameras like smartphones, action cameras, point and shoots, and if you’re micro 4/3, APS-C or full frame camera is small and light weigh enough, you can also throw that on the M2. I was actually pretty excited to get this but after essentially my first use, I can tell that there were some issues and annoyances that no one seems to be pointing out. Don’t get me wrong, this thing works and functions as it should but I think it’s overhyped and you should be aware of some things.

ASSASSIN_S005_S001_T049.jpg

First, let’s look at the design. One thing that other reviewers really like to highlight is this gimbal’s ability to lock up so it doesn’t move around during transport. This was something that I was really looking forward to, until seeing how it is implemented in person. At the base of the pan axis is a physical switch to lock this axis in place. This lock works flawlessly.

ASSASSIN_S005_S001_T057+.jpg

Then we get to locking the other axis. Unlike the pan, there is no physical lock anywhere else. The upper section of the gimbal is held in place by a series of cutouts that line up with each other and a pin that holds the camera carriage in place. Storage mode is basically accomplished by utilizing friction and male/female alignments. The problem with this is that over time, the surfaces that require direct contact will get absolutely destroyed. Say goodbye to that nice black finish. Another problem with this is that because you have to go out of your way to take the gimbal out of balance to put it in storage mode, you’ll have to re-balance the gimbal every time that it is utilized.

But wait, another thing about the M2 that is overhyped is the memory lock. This is essentially a stopper that you can set so that when you throw the gimbal out of balance, you can easily move the adjustment point to where the stopper is and know that that is where it should be to have a balanced gimbal. That’s wonderful! It works well, but it’s only available on 1 of the 5 adjustment points. It’s only available on the roll axis. Thank you for making my life easier on the point that’s easiest to adjust and not anywhere else!

ASSASSIN_S005_S001_T053.jpg

Another thing that people seem to be hyping quite a bit is the quick release plate. This can be extremely useful but here, it’s pretty stupid. This isn’t new. Many other gimbals use a quick release plate system but with those, you actually get a functional system. They use plates that are common like the Manfrotto or Arca Swiss style. Here, we get a proprietary plate. This means that you either have to have a camera dedicated to this gimbal or be prepared to switch plates as you move from this gimbal to something else and of course, be prepared to rebalance every time because the camera carriage ajustment point is the same as the screw that holds the camera in place. On the more thought out gimbals, these would be two independent things. Because these two thigns use the same screw, the screw has to be big enough so that people can put enough torque on it to tighten it in place. This makes putting the camera with the plate down on a flat surface impossible. I just think that the entire camera carriage section was poorly thought out.

Finally, from someone who uses a lot of gimbals and makes instructional videos on balancing them, the Zhiyun Crane M2 is probably the hardest gimbal that I’ve ever had to balance. A lot of this has to do with it’s overall size. Because it’s made for smaller cameras, the gimbal and it’s adjustment points are smaller. When I balance this gimbal, it seems like I’m often extending the adjustment points to their max. It seems like with any adjustments, the parts start to hit each other and cause cosmetic damage. For the small size of the gimbal, we give up proper clearance for balancing. This may also be an issue for come cameras as the cameras may bang up against the gimbal during balancing and in use.

Even with these complaints, if you were to ask me if I would recommend the Zhiyun Crane M2, the answer would have to be yes. For the price of this gimbal, it’s going to be hard to find something as feature packed and versatile. This is a great gimbal but some of its features were just overhyped. I received this product for free for review. I would assume that other reviewers who made early reviews also did too. I just wonder if these other reviewers really did not notice these issues/annoyances or they just chose to keep their mouths shut in hopes of getting more free products in the future. Again, this gimbal is recommended but don’t think that it’s the perfect gimbal. Some of the designs could use improvements but this is probably the best that we have right now.


If you're considering on buying any of the products mentioned, please support my work by using the links below.

Zhiyun Crane M2 https://amzn.to/2GRb8LS


Want to support my work?

Consider visiting the shop and buying "Absolutely Nothing"
https://www.HaiHoangTran.com/shop/absolutely-nothing

or

Become a Patron!
https://www.patreon.com/HaiHoangTran

or

PayPal
PayPal.me/HaiHoangTran

Glycine Combat Sub 42 Bronze Ref. GL0187

I’ve recently been in the market for a bronze watch. This is for the same reason that I wanted a brass black paint Leica. I like things that feature materials that will age and will uniquely patina to my usage. That being said, I’ve always been somewhat on the fence about getting a bronze watch. Nevertheless, I did my research and narrowed the options down to either the Tudor Black Bay Bronze at $4050 or the Oris Big Crown Pointer Date 80th Anniversary Edition at $2000. Both are seemingly great watches, but I just couldn’t pull the trigger. I just couldn’t make that multi-thousand dollar investment on a material that I wasn’t sure of so I put the idea of getting a bronze watch on the back burner. Then one day, all of a sudden, I saw a listing for the Glycine Combat Sub 42 Bronze at $415 and I knew that I just had to get it.

ASSASSIN_S005_S001_T045.jpg

The Glycine Combat Sub GL0187 features a 42mm bronze case with unidirectional turning bezel. Unlike the case, the bezel ring itself is actually made from aluminum. The dial of the watch is what Glycine calls charcoal-black and features a gradient. Towards the top by 12 o’clock, the dial is a much lighter shade of gray and works itself to black by 6 o’clock. If you don’t like the charcoal-black, there is a gradient brown dial version reference GL0188, gradient blue dial reference GL0174/GL0242 and even gradient green dial version reference GL0281. Also, if 42mm is too small for you, there is a 48mm version reference GL0200/GL0243. I’m personally still unsure of how I feel about this gradient dial. I would’ve much preferred a radial gradient which would’ve made the design more uniform. The dial also features applied indexes with a rose gold border and Super-LumiNova. The hour and minute hand features a similar treatment with a brushed rose gold coating and Super-LumiNova. For contrast, the Combat Sub features an all red second hand with more Super-LumiNova. Protecting all of this is a flat sapphire crystal with 3 layers of antireflective coating on the underside.

ASSASSIN_S005_S001_T055.jpg

On the back is a solid steel screw down case back. This is fairly common with bronze watches as the stainless steel will not react to skin contact and will not patina over time. This is a good design choice considering that had the case back been made of bronze, it would’ve likely patina very quickly with all the exposure to the skin and this may be uncomfortable and can irritate the wearer. However, I would’ve liked the color of the case back to match the rest of the case. This is something that other bronze watch manufacturers do and it really pulls everything together. It’s not like this isn’t possible for Glycine because after all, the strap buckle is also stainless steel but as you can see, it’s treated to match the case. The silver is such a stark contrast and to me is unappealing. It’s just a good thing that this part of the watch never gets seen with normal use.

ASSASSIN_S005_S001_T053.jpg

This combat sub ships with a composite strap. The exterior layer of the strap is a fabric material embossed with something reminiscent of a brick pattern and is bonded to the interior calf leather layer. To me, the strap feels comfortable on the wrist because of the leather but the exterior looks cheap and synthetic because of the pattern that Glycine went with. The perceived value of this strap would’ve been higher had they gone with a smooth texture, a more natural leather grain or an alligator grain print. I personally will not be wearing this watch on the stock strap. One thing that I would like to point out is that on the GL0187 spec sheet, it lists the strap as having 24mm horns and 22mm buckle. I’ve never seen a manufacturer list “horns” but it would make sense to assume that they meant that the strap is 24mm apart at the lugs and tapers to 22mm at the buckle. This apparently is not so because this watch actually takes 22mm straps. Again, if you want to fit this watch case with different straps, then buy 22mm straps.

ASSASSIN_S005_S001_T059.jpg

The bronze Combat Sub features the calibre GL224 Swiss automatic movement which is a modified ETA 2824-2. This movement vibrates at 28,800 bph and has a power reserve of 38 hours. Now, I’m not going to be one of those people who will sit here and act like I’m knowledgable on this movement. Aside from the quick Google search, I have no frame of reference for it. But, according to the internet, this does seem to be a reliable workhorse that is widely use. This means that it should have some longevity and if it were to have some issues, you should be able to get it repaired with ease and for a decent price. To me, the only minor let down of this movement is the 38 hour power reserve. This would make it the shortest power reserve of all my watches. It’s just a shame that you can’t go at least full 2 days without winding it but it is what it is.

Check out THIS writeup to learn more about the ETA 2824 movement.
https://wornandwound.com/caliber-spec-eta-2824-automatic-people/


m79250ba-0001.png

Earlier I mentioned that there were a few other bronze watches that I had in mind prior to buying this Glycine, one of them being the Tudor Black Bay Bronze. If you’re familiar with that watch, then I’m sure that you can see some very similar design cues. To me, this is a clear homage to the Black Bay. I don’t know which came out first but the original brown Black Bay Bronze was introduced in 2016 and black Black Bay Bronze in 2019. According to the Glycine website, all of its bronze Combat Subs are new for 2019. If this is correct, then I think we can assume where Glycine got the inspiration for its design. But that’s neither here nor there. This is not a comparison of the two watches. However, if you are interested in a cheaper alternative to the Tudor Black Bay Bronze 2016 or 2019 model, then this is a good choice.

This watch lists at over $1000 but you definitely should not be paying that much. I’ve seen this Glycine regularly around $600 and I think that that’s a fair price. However, if you’re able to pick it up for even less, again I paid $415 with manufacturer warranty, then this watch is an absolute steal.


If you're considering on buying any of the products mentioned, please support my work by using the links below.

Glycine Combat Sub Bronze https://amzn.to/2XCHCmF
Tudor Black Bay Bronze https://amzn.to/2XBiZXu
Oris Big Crown Pointer Date Bronze https://amzn.to/2XyV8ru


Want to support my work?

Consider visiting the shop and buying "Absolutely Nothing"
https://www.HaiHoangTran.com/shop/absolutely-nothing

or

Become a Patron!
https://www.patreon.com/HaiHoangTran

or

PayPal
PayPal.me/HaiHoangTran

Back to Asia! First stop Hanoi!

It is official! Summer 2019 will be spent in Vietnam and maybe a few other countries. That means that there’s going to be a lot of new content coming from me. This time, I’m traveling lighter and am not bringing a computer along to edit videos on the go so those will periodically come out when I return. In the meantime, I’ll be keeping you updated with my travels through this blog!

IMG_1770.JPG

At the moment there is no set return date. I got a one way ticket and will just bum around for awhile. I actually didn’t even get my plane ticket until 5 days before leaving. This is a case of do as I say and not as I do because buying plane tickets so close to the departure date just means that you’re probably going to be paying more than if you purchased in advance. But in this case, buying a one way ticket gives the perception that it’s not all that expensive.

Previously, whenever I go to Vietnam, I would fly with Eva Air. This time, there were some worker strikes occurring that caused a lot of issues with Eva flights. So instead, I went with Korean Air. This is a different experience because the flight departed at 1 pm. When flying with Eva, it’s usually an early AM red eye flight. With Korean Air, I was also not able to pick my own seat. Now that I do a decent amount of flying, I’ve become very particular about where I sit so this was a bit of an annoyance.

To change things up, this time I’m spending some time in northern Vietnam and what better starting point than the capitol city, Hanoi. I actually don’t know if I’ve ever been to Hanoi before. I may have been when I was a child but definitely not in my adult life. Because Hanoi is such a large city, I expected it to be like Ho Chi Minh City (HCMC). In some ways, it is. It is definitely populated and busy like HCMC, but it has its own spirit.

IMG_1831.JPG

There’s something that you should know about me. I was born in Vietnam and immigrated to America when I was 7/8 years old. I can still speak Vietnamese because that’s all that I spoke with my family growing up, but I would say that my vocabulary reflects that of a child. I don’t know much beyond basic words and only enough to get me through a simple conversation. I can work my way through complicated subjects, but it’ll take some talking in circles and describing concepts. You should also know that my family comes from southern Vietnam. This is important because the speech of the two sections of Vietnam can sound very different. Consider northern Vietnam as British English and southern Vietnam as American English. The British tend to pronounce everything as written while the Americans play with the words in a way. To me, this is similar to the northern and southern Vietnamese dialect. The way that I pronounce some words sound nothing like how they are written. Northern Vietnamese people also have an accent and sometimes it can be extremely strong. Because of this, sometimes I cannot even understand northern Vietnamese people even though we are technically speaking the same language. This was actually my biggest concern for this trip but when in doubt, speak English and act like a foreigner. Most larger places will be able to speak enough English to be able to sell you things and give you service.

 
IMG_2478.JPG

In Hanoi, I stayed at the Ancient Lane Hotel and paid $182 for 7 days / 6 nights. The hotel is tucked away in a little alley of the Old Quarter of Hanoi. It is right in the midst of the local culture. In the morning, the surrounding space is extremely busy as there is a local market literally within 10 or so steps from the hotel doors. At night, the space turns into small in home restaurants. This is the type of accommodation that will allow you to see an authentic local experience.

One thing that I really enjoyed about this particular location is its relatively close walking distance from many popular attractions. From here, you can walk to Hoàn Kiếm Lake, Train Street, St. Joseph's Cathedral and the night market.

Hồ Hoàn Kiếm (Hoàn Kiếm Lake) is a popular local attraction. Besides the lake itself being a popular place to just hang out, you can also cross the Cầu Thê Húc and visit the Đền Ngọc Sơn (Temple of the Jade Mountain). This costs 30,000 Vietnamese Dong and I think it’s worth it. The temple itself is not all that big but it does provide you with a quick escape from the hustle and bustle of the city.

IMG_1783.jpg

Train Street is just as the name implies, a street that happens to have a train track running through it. Aside from that, many people have set up homes and business along the sides of the track. Most of these businesses are eateries but because this is such a popular location, prices tend to be slightly higher than other places. Note that Train Street essentially runs along the entire train track. Different portions of the track can provide completely different experiences. The track is also still active but the train only runs at certain times of the day. The times will be dependent on the portion of the track that you visit.

IMG_1800.JPG

Nhà Thờ Lớn Hà Nội (St. Joseph's Cathedral) is another popular location in the area. To be honest, I did not find it to be all that impressive. From the outside, the cathedral looked unkept and dilapidated as the paint is peeling and the structure just exuded a certain rundown feel. When I went, there were gates that denied entrance into the cathedral. I asked some locals and was told that it only opens on the weekend so take note if you want to get inside. Even though I find it unimpressive, I would still recommend you check it out because it’s free and why not? Unless you’re on a tight schedule, then something is better than nothing.

The Hanoi Night Market is another popular attraction that is note worthy. This is something that occurs every weekend beginning at 6 pm when the city streets begin to get blocked off to create one giant outdoor market. I only got the chance to go once and I think I did it wrong. First of all, I went at 6pm and I don’t really recommend doing this unless you want to see the stalls being setup. It takes quite awhile to get everything going so go a bit later at like 7/8 pm. I began at the Hàng Đào street entrance and just walked along it. From what I saw, there were a lot of stalls selling merchandise and not a lot of food like I was hoping for and saw on the internet. For me, this was quite disappointing. After leaving and doing more research, it turns out that there was so much more to the market and so many subsections. The night market is quite large and certain sections specialize in certain things. Some sections have more merchandise while others have more food.

IMG_2218.jpg

Hanoi is an amazing city, but it can get repetitive. It’s a lot of buildings, vehicles and people. During this trip, I didn’t actually spend too much time in Hanoi. I personally just used Hanoi as a hub for other explorations as it’s located relatively close to many other interesting cities and parts of Vietnam. I would leave Hanoi and come back until it was time to leave again. Even so, the little time that I spent in Hanoi has left such a strong impression. It is one of those places that I would definitely want to visit again. If you ever get the opportunity to travel to Hanoi, just do it. It’s an experience unlike any other and is a city that should be on your bucket list.


Want to support my work?

Consider visiting the shop and buying "Absolutely Nothing"

https://www.HaiHoangTran.com/shop/absolutely-nothing

or

Become a Patron!

https://www.patreon.com/HaiHoangTran

Hiking Reflection Lake to Narada Falls Loop | Mt. Rainier National Park

It’s been raining on and off in Washington over the past week and I’ve been itching to go outside. At first sign of a sunny day, I went out and decided to hike from Reflection Lake to Narada Falls. This was done by combining two separate hikes to create a loop. I started at Reflection Lake and hiked to Narada Falls via the Lower Lakes and Narada Falls trail. To get back to Reflection Lake, I hiked the Wonderland Trail. Overall, this is a hard hike to recommend. For the amount of effort required to complete, there is little payoff. To me, you’d be better off just driving to the two endpoints rather than wasting the energy hiking in between.

Reflection Lake to Narada Falls: Distance 3.6 miles Elevation Gain 931 feet Narada Falls to Reflection Lake: Distance 3.0 miles Elevation Gain 751 feet

Reflection Lake to Narada Falls: Distance 3.6 miles Elevation Gain 931 feet
Narada Falls to Reflection Lake: Distance 3.0 miles Elevation Gain 751 feet

For this blog I’ll consider my route as two different hikes as that’s what it is. I connected the two trails to create a loop but alternatively, you can simple hike one trail and go back the way you came.

IMG_1452.JPG

According to the internet, the first hike from Reflection Lake to Narada Falls is 3.6 miles long with an elevation gain of 931 feet. I would consider this to be the more enjoyable of the two trails. That being said, it isn’t all that special. Starting the hike, you will see a trail sign that indicates that you are .9 mile from the Narada Falls trail. I misread this and read that I was .9 mile away from Narada Falls itself. Don’t make this mistake, there is still some distance to go.

For the first mile or so of the hike, it is a very typical Washington hike. You are doing a lot of walking in the forest. There are a few prairies, but still pretty typical. When I went, there was still some leftover snow on the trail but nothing that couldn’t be easily traversed or dodged. Even with the snow, the temperature was comfortably warm and some of the wildflowers have begun to bloom. If you watch the video above, you’d notice that about a mile into the hike, I point out an opening in the tree line which reveals a nice view of Mt. Rainier. This is probably the best view of the mountain that you’ll get on this trail. The rest of the time you’ll be surrounded by tall trees.

Once you make it out of the forest, you’ll cross a paved road and will hit a trail sign indicating the start of the Lakes Trail and that you’re .2 mile from the Narada Falls trail. This is actually my favorite section of the hike. From here, you’ll quickly run into a few different streams and waterfalls. Along side a few of the streams are large rocks which can be accessed and climbed. Some people were actually picnicking around here on the rocks. From here, you’re only a short distance to Ruby Falls and ultimately Narada Falls. I almost want to recommend just starting the hike from this trail sign as all the views of the river and various waterfalls start here. The sign happens to be directly next to a road with space to park. If you want to get some interesting views in a short distance and requires little effort, start here!

HHT02283.jpg

The second hike is from Narada Falls to Reflection Lake. This is a 3 mile long hike with an elevation gain of 751 feet. I did not find this hike to be enjoyable. I consider this hike in two parts, before and after the switchbacks. The hike hike from the beginning of the trail to the end of the switchbacks is a straight uphill climb. The trail is often narrow with only enough space for one person to pass at a time. For most of this section you’ll be surrounded by tall trees and bush so again, there isn’t much to look at. The bushes were often overgrown and came into the trail. After the switchbacks, the ground begins to levels out and there are even some down hill areas. The trail even opens up a bit with some nice prairies and rock fields. The only problem is that by the time this happens, you’re walking directly below/beside a road so you hear a lot of car noise on a busy day. This is a hike that I would not recommend. If you are doing this loop, it may even be more worthwhile to just go back the way you came and do the reverse of the previous hike. At least this way you’ll have a second look at all those waterfalls.

I did this hike late in the afternoon on a particularly busy day. The wait to get into the entrance of the park was the longest that I’ve ever seen. Even so, there was really no one on the trail and I can definitely see why. The obvious reason is that the final destination, Reflection Lake and Narada Falls, are located directly off the road. Few people are doing to take the time to walk the distance in between. The second and more cynical reason is because the hike sucked. I personally will probably never repeat this hike. Unless you’re intentionally out to get some exercise and do not care the views, just drive to the destinations. Save yourself the time and energy for one of the other hikes available in the park. 

IMG_1450.JPG

Want to support my work?

Consider visiting the shop and buying "Absolutely Nothing"

https://www.TheUpperLeftUSA.com/shop/absolutely-nothing

or

Become a Patron!

https://www.patreon.com/HaiHoangTran