Travel

Hiking Reflection Lake to Narada Falls Loop | Mt. Rainier National Park

It’s been raining on and off in Washington over the past week and I’ve been itching to go outside. At first sign of a sunny day, I went out and decided to hike from Reflection Lake to Narada Falls. This was done by combining two separate hikes to create a loop. I started at Reflection Lake and hiked to Narada Falls via the Lower Lakes and Narada Falls trail. To get back to Reflection Lake, I hiked the Wonderland Trail. Overall, this is a hard hike to recommend. For the amount of effort required to complete, there is little payoff. To me, you’d be better off just driving to the two endpoints rather than wasting the energy hiking in between.

Reflection Lake to Narada Falls: Distance 3.6 miles Elevation Gain 931 feet Narada Falls to Reflection Lake: Distance 3.0 miles Elevation Gain 751 feet

Reflection Lake to Narada Falls: Distance 3.6 miles Elevation Gain 931 feet
Narada Falls to Reflection Lake: Distance 3.0 miles Elevation Gain 751 feet

For this blog I’ll consider my route as two different hikes as that’s what it is. I connected the two trails to create a loop but alternatively, you can simple hike one trail and go back the way you came.

IMG_1452.JPG

According to the internet, the first hike from Reflection Lake to Narada Falls is 3.6 miles long with an elevation gain of 931 feet. I would consider this to be the more enjoyable of the two trails. That being said, it isn’t all that special. Starting the hike, you will see a trail sign that indicates that you are .9 mile from the Narada Falls trail. I misread this and read that I was .9 mile away from Narada Falls itself. Don’t make this mistake, there is still some distance to go.

For the first mile or so of the hike, it is a very typical Washington hike. You are doing a lot of walking in the forest. There are a few prairies, but still pretty typical. When I went, there was still some leftover snow on the trail but nothing that couldn’t be easily traversed or dodged. Even with the snow, the temperature was comfortably warm and some of the wildflowers have begun to bloom. If you watch the video above, you’d notice that about a mile into the hike, I point out an opening in the tree line which reveals a nice view of Mt. Rainier. This is probably the best view of the mountain that you’ll get on this trail. The rest of the time you’ll be surrounded by tall trees.

Once you make it out of the forest, you’ll cross a paved road and will hit a trail sign indicating the start of the Lakes Trail and that you’re .2 mile from the Narada Falls trail. This is actually my favorite section of the hike. From here, you’ll quickly run into a few different streams and waterfalls. Along side a few of the streams are large rocks which can be accessed and climbed. Some people were actually picnicking around here on the rocks. From here, you’re only a short distance to Ruby Falls and ultimately Narada Falls. I almost want to recommend just starting the hike from this trail sign as all the views of the river and various waterfalls start here. The sign happens to be directly next to a road with space to park. If you want to get some interesting views in a short distance and requires little effort, start here!

HHT02283.jpg

The second hike is from Narada Falls to Reflection Lake. This is a 3 mile long hike with an elevation gain of 751 feet. I did not find this hike to be enjoyable. I consider this hike in two parts, before and after the switchbacks. The hike hike from the beginning of the trail to the end of the switchbacks is a straight uphill climb. The trail is often narrow with only enough space for one person to pass at a time. For most of this section you’ll be surrounded by tall trees and bush so again, there isn’t much to look at. The bushes were often overgrown and came into the trail. After the switchbacks, the ground begins to levels out and there are even some down hill areas. The trail even opens up a bit with some nice prairies and rock fields. The only problem is that by the time this happens, you’re walking directly below/beside a road so you hear a lot of car noise on a busy day. This is a hike that I would not recommend. If you are doing this loop, it may even be more worthwhile to just go back the way you came and do the reverse of the previous hike. At least this way you’ll have a second look at all those waterfalls.

I did this hike late in the afternoon on a particularly busy day. The wait to get into the entrance of the park was the longest that I’ve ever seen. Even so, there was really no one on the trail and I can definitely see why. The obvious reason is that the final destination, Reflection Lake and Narada Falls, are located directly off the road. Few people are doing to take the time to walk the distance in between. The second and more cynical reason is because the hike sucked. I personally will probably never repeat this hike. Unless you’re intentionally out to get some exercise and do not care the views, just drive to the destinations. Save yourself the time and energy for one of the other hikes available in the park. 

IMG_1450.JPG

Want to support my work?

Consider visiting the shop and buying "Absolutely Nothing"

https://www.TheUpperLeftUSA.com/shop/absolutely-nothing

or

Become a Patron!

https://www.patreon.com/HaiHoangTran

Minimizing my Camera gear for Travel

Nothing is finalized yet, but it’s looking like I’ll be spending a good portion on my summer traveling abroad. This may be my most complicated trip in terms of logistics and when traveling, the thing that complicates my trips the most has to be my camera gear. I’m the type of person that likes to pack everything to make sure that I forget nothing. This just means that I bring a lot of stuff. This makes traveling complicated because before I even get to my destination, I have to worry about whether or not the gear will even successfully make it on the plane and inside the cabin. If you’ve haven’t seen it, in my Traveling by Plane with Camera Gear video, I talked about how camera gear and anything that you find valuable should be taken into the cabin as a carryon because unless you’re traveling with something like a Pelican case, there is a huge chance of the gear getting damaged. From my experience, the best way to get this done is to just travel with a bag that will blatantly fall within carryon size requirements and to travel light because many international airlines have a strict carryon weight requirement. Downsizing my gear of course also has the benefit of making my entire experience more enjoyable because I don’t have as much to carry around. With all of that in mind, I’m going to walk you through what I think will be the best minimal setup for me.

First let’s talk about the bag because that’s possibly the most important factor to all of this. The bag that I’ve decided on is the Jill-E Designs JACK Hemingway 15" Leather Backpack. This is a new bag for me but I saw the potential because it seems to be pretty well setup for travel even though it’s fairly simple and minimal. On the outside is one external pocket. This is pretty decently sized and I think it’ll be good for holding things like filters, batteries and small accessories like that. On the side of the bag is a zipper which leads to a stretch panel made for a water bottle but I’ll probably make this work with my travel tripod. Moving inside, the bag has a bunch of organization pockets for pens, electronic devices and the like. I chose this backpack because like I said earlier, it is blatantly smaller than any carryon size requirement. I’m certain that this bag will actually work as a personal item, which is another type of baggage that you’re typically allowed in the cabin. Again, watch that Traveling by Plane with Camera Gear video to learn more about this. So, if I’m able to efficiently use this bag, I’ll actually still be allotted a carryon luggage. This means that I’ll just be able to carry on my essentials in the carryon and maybe not need anything else besides the two bags.

My current plan is to use the Jill-E bag as my camera bag and I’ll be able to accomplish this with the various camera inserts that are available for this bag. I actually own two different inserts, the
Jill-E Designs Jack Backpack Insert and the Jill-E Designs E-Go Camera Insert. Right now, it’s looking like I’ll be bringing both of these along for my trip. The larger Backpack Insert will be used when I’m just traveling and have everything put away. The E-Go Camera Insert will be for short day trip use where I’m just carrying one body and one lens. The E-Go Camera Insert actually comes with its own carrying strap that turns the insert into an independent bag so if I really want to go minimal, this is an option. Again, if I’m able to carry all my camera gear in this bag, it’s going to make my life a lot easier when traveling and frees up my carryon.

Now, let’s talk about the camera gear that I’ll be bringing. After some thought, I think that I’ll only be bringing one main camera setup and that’ll be the Sony A7RIII and the Sony 24-70mm f/2.8 GM. This is the setup that I most use on a day to day basis and the setup that I’m most used to. With this, I’m pretty much able to get anything done. I’ve actually traveled with a similar setup in the past and it was nice but definitely limiting. I shoot photos and videos and having only one camera really makes this difficult because I can only shoot photos or videos, not both at the same time. Sometimes, I like to get footage of myself doing photography. This is obviously not possible with only one camera. The only answer is to bring another camera, one for photos and one for videos. So, if I do bring another camera it will be the Sony A7RII and attached to that will be the Sony Vario-Tessar T* FE 16-35mm f/4 ZA OSS Lens. Finally, the tripod. A lot of my work involves the use of a tripod so it’s just something that I’ll have to bring. The one that I’ve decided to bring is the Benro FIF19CIB0. This is my current favorite travel tripod. It’s small, lightweight and extremely capable.

Like I said, the trip is not finalized yet. I don’t know when I’ll be leaving, where I’m going or which airline I’ll be flying with. That last factor is a major determiner for all of this. Different airlines have different regulations for luggages. The airline that I fly with will play a role in the gear that I bring.

All that being said, this is looking to be a travel heavy summer. There’s going to be a lot of new travel/photography content coming soon so make sure to check back for that!


If you're considering on buying any of the products mentioned, please support my work by using the links below.

Jill-E Designs JACK Hemingway 15" Leather Backpack https://amzn.to/2KlAoNQ

Jill-E Designs Jack Backpack Insert https://amzn.to/31DV3lk

Jill-E Designs E-Go Camera Insert https://amzn.to/2RiCte0

Sony A7RIII https://amzn.to/31ABpXE

Sony 24-70mm f/2.8 GM https://amzn.to/2IjKXPa

Sony A7RII https://amzn.to/2O35rwl

Sony Vario-Tessar T* FE 16-35mm f/4 ZA OSS Lens https://amzn.to/2JED5VG

Benro FIF19CIB0 https://amzn.to/2Idiw6x


Want to support my work?

Consider visiting the shop and buying "Absolutely Nothing"

https://www.TheUpperLeftUSA.com/shop/absolutely-nothing

or

Become a Patron!

https://www.patreon.com/HaiHoangTran

How I planned to photograph the Wreck of the Peter Iredale

As you can see by the linked video above, I recently went and tried to photograph the Peter Iredale shipwreck in Warrenton, Oregon. This was a planned spontaneous trip. That’s completely contradictory but let me explain. I had a 3 day window to make this trip happened so in that sense, the trip was planned. Other than that, I had no idea when I was actually going to go because there were specific conditions that I was looking forward to photographing. In this blog, I’ll lay out the things that I considered and maybe that’ll help you out on your own adventure.

IMG_A853864C8EA4-1.jpeg


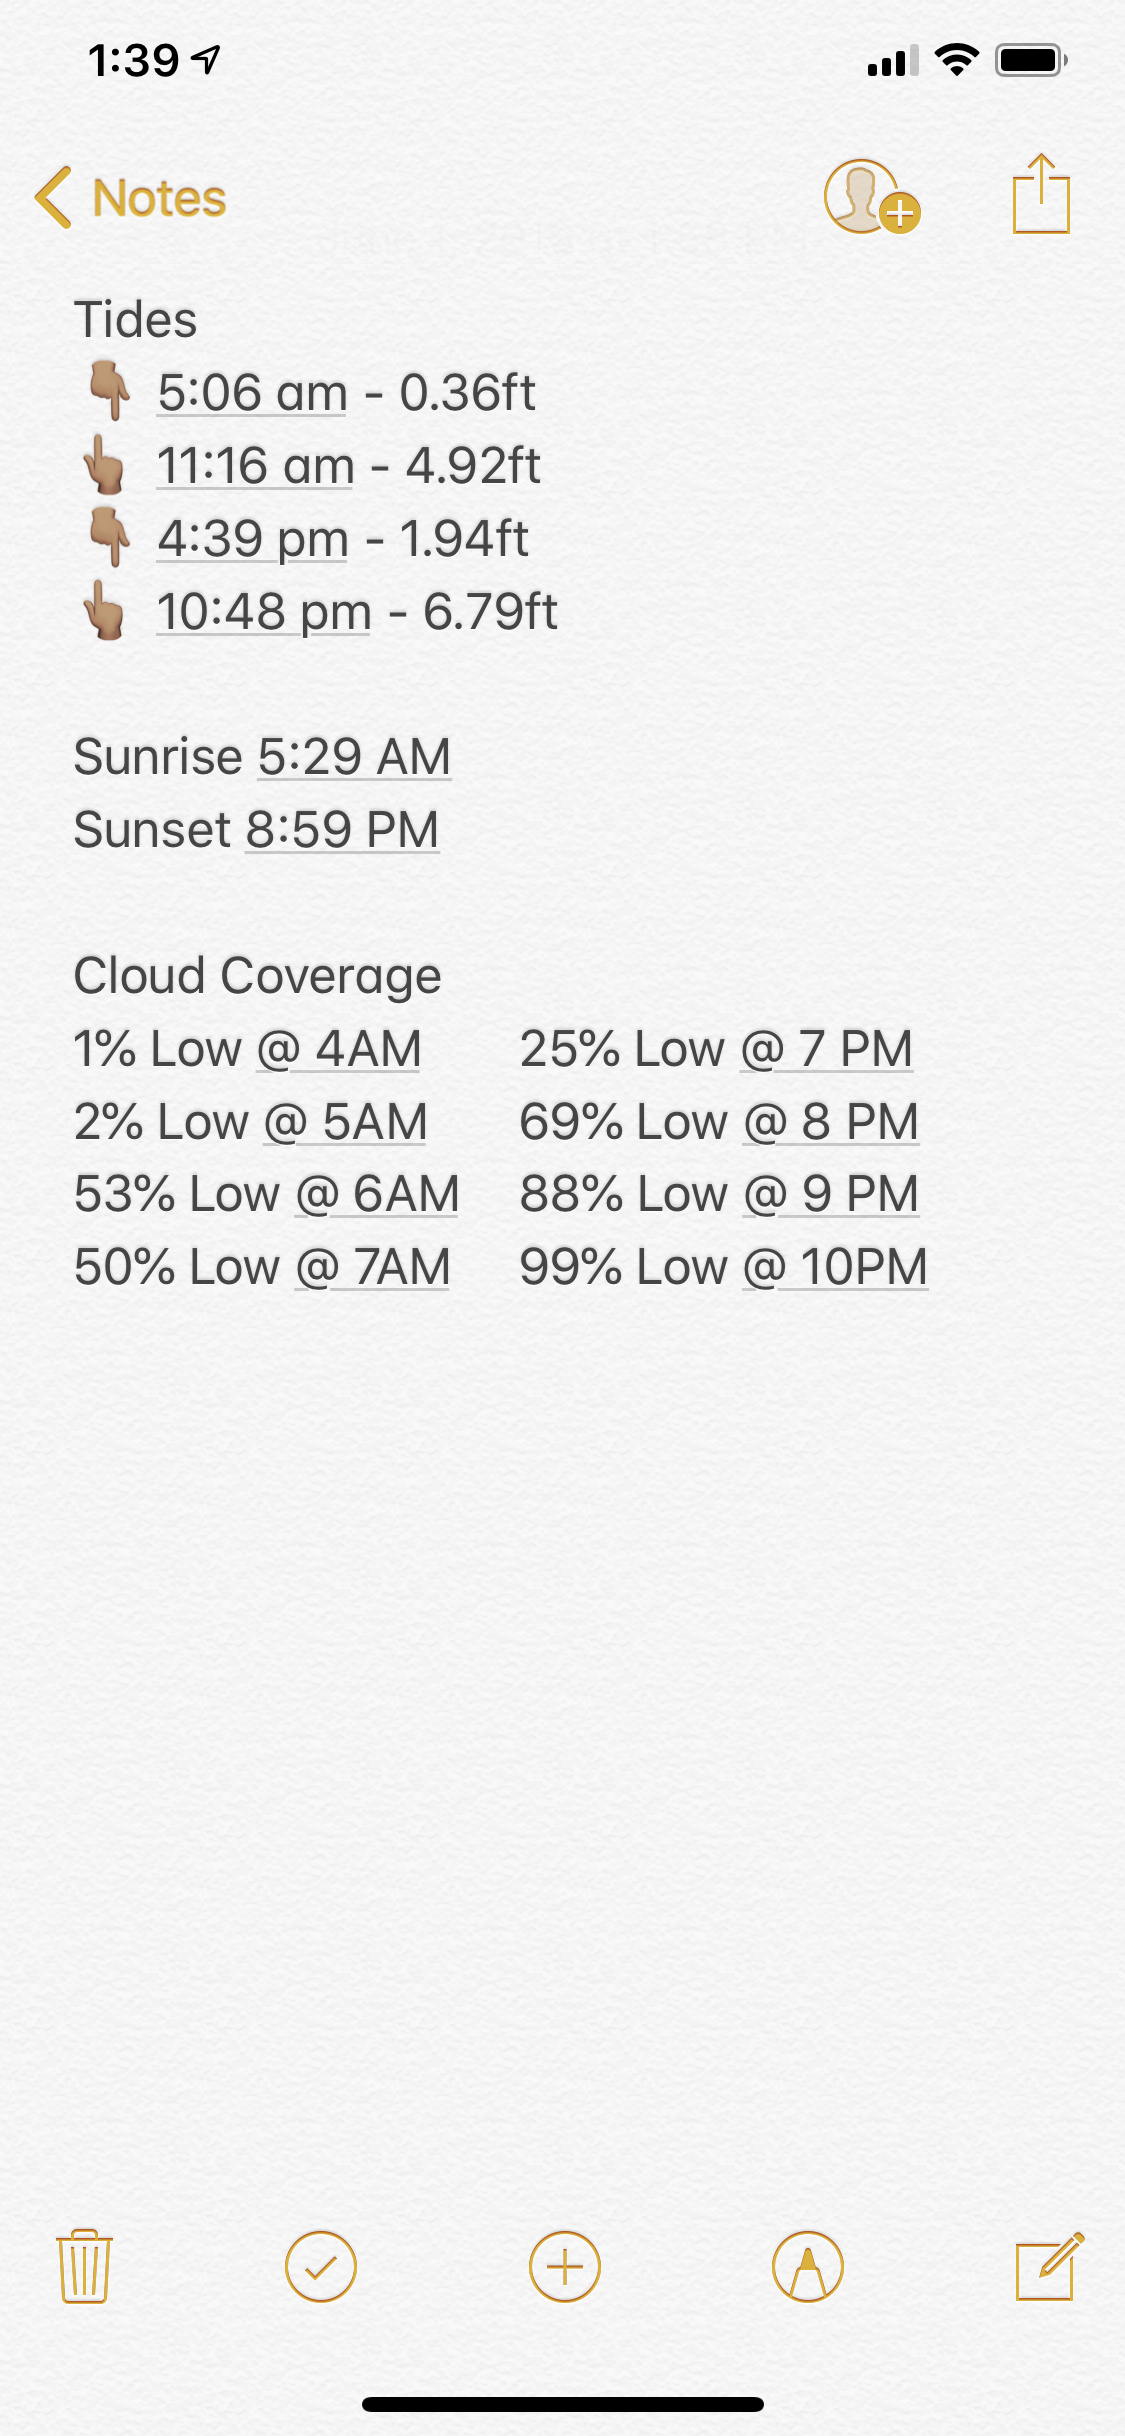
When it comes to timing my photography, the attached screenshot pretty much says it all. Tide schedule, sunrise/sunset times and cloud coverage. These are the 3 most important environmental factors that I consider when doing landscape photography. Realistically, the tides only come into play in some scenarios because they only have a big effect when photographing near large bodies of water. The other 2, are hypercritical. Nevertheless, I’ll cover all 3 factors and how they effect my photography.

First, the tides. Again, this is only something to consider when photographing near large bodies of water. Since the Peter Iredale sits on a beach right next to the Pacific Ocean, the tides can have some drastic effects on the composition. For this location, I knew that I wanted a composition with high tide. I’ve seen photos of the Peter Iredale in low tide and it’s not exactly the prettiest site. The Peter Iredale has been shipwrecked for over 100 years. Spending all that time in salt water did not treat the ship well. It is completely rusted over and there is very little left of it. In low tide, I think it just looks like large scrape metal siting in the sand. However, the rising tide really provides a whole new prospective to the subject. The tides provide a surface for reflections and adds some movement to the scene. It just makes the entire location so much more interesting. Because of this, I had to make sure that I was photographing near one of the high tide times, 11:16AM or 10:48PM.

Next, I had to align the high tide times with sunrise or sunset. This should be obvious. Most photographers would say that the best light is going to be around sunrise and sunset. These times provide that soft light that just seems to make any subject look better and, of course, once in awhile we get some fantastical colors that can really only be seen around these times. I typically am a sunrise shooter and never go at sunset unless I’m already at the location. If it’s a planned trip, I almost always go at sunrise. This is simply because there are going to be much less people around. At sunset, most people are going to be awake and exploring. This just means that tourist attractions like the Peter Iredale are going to be flooded with people. People who will walk into the composition and interrupt my work. I’d rather just avoid this and go at sunrise when very few people are going to be interested enough in anything to actually make the effort of waking up that early. However, to me, the Peter Iredale is a sunset location. If you track the sun movement pattern at this location, you will see that the sun rises over land and sets over the ocean. Considering that I’m looking for high tide, it’s going to be much easier to stand on land, shooting sunset over the ocean than standing in the ocean and shooting sunrise over land. It’s also important to note that most of the crazy colors that we see during sunrise/sunset is going to be near the sun. So in this case, it just makes sense to go at sunset because the sun and possible crazy sunset colors will be over the ocean, which happens to be the direction that I was photographing to capture the high tide. See? It all comes together.

Lastly, cloud coverage. Clouds contribute to the overall lighting but most importantly on this shoot, sunset conditions. Getting those fantastic sunrise/sunsets are tricky. The conditions have to be just right or you’ll just get the very typical yellow sunrise/sunset. A big determiner is the cloud coverage. There’s a lot that goes into this so I’ll try to make it as simple and straight forward as possible. There are various types of clouds and they sit in different sections of the sky. Some clouds offer a better chance of a great sunrise/sunset than others. For the sake of simplicity, let’s just consider that there are low, medium and high clouds. Low clouds are generally bad for sunrise/sunsets. Low clouds are low in the sky and sit near the horizon. This is also where the sun rises and sets. So if there is a lot of low clouds, the sun will be blocked and there will be no fantastic sunrise/sunset. Ideally, we want medium and high clouds but there is a thing as having too little or too much of any. On the day that I photographed the Peter Iredale, there were no medium or high clouds, just a lot of low clouds. Believe it or not, this was actually the most favorable forecast for the days that I could go. On other days, there was predicted 100% low cloud coverage so I knew that there was no chance of a sunset. Still, predicted 88% low cloud coverage isn’t ideal and that really effected my images negatively.

And that’s just about everything that I considered in terms of atmospheric conditions for this shoot. The things that I’ve laid out can effect most outdoor photography situations so it’s helpful to understand them. Next time you go out, take some time to look at the various condition forecasts. Take note of what they are and how they effected your photography. After some time, you’ll be able to understand what everything means and what to look for. All of that being said, it’s more important to just get out and shoot. Get the practice in. Don’t get caught up in planning for the best conditions and prevent yourself from going out on a possibly bad condition day. Remember that the forecasts are largely predictions and estimates. Conditions constantly change. You never know when that crazy sunrise/sunset is going to happen. So get out as much as possible.


Want to support my work?

Consider visiting the shop and buying "Absolutely Nothing"

https://www.TheUpperLeftUSA.com/shop/absolutely-nothing

or

Become a Patron!

https://www.patreon.com/HaiHoangTran

5 days in New York

I recently had the chance to travel to New York for the first time. Although this was suppose to be a vacation, any trip that involves extensive traveling will ultimately become a work trip as that provides for some great content. I stayed in New York for 5 days and in this blog, I’ll break down what I did for those who are simply interested or for those who are looking for a similar experience.


Day 1

This was technically a travel day but with some proper planning, you can leave yourself with plenty of time to explore. My flight was from SEA - JFK. I decided to take a red eye flight that left Seattle at 10:43pm and landed in New York at 7am. Landing early in the morning means that I essentially had the entire day to explore. This also saves money on room and board as you don’t have to pay to just sleep if you take a flight that lands later in the day. The only problem with this plan is what to do with your luggage (if you brought one). Since most hotel check ins are later in the day, arriving early means that you will have to drag the luggage around everywhere you go. One option is to ask the hotel to hold the luggage prior to checkin. For this trip, I was lucky and my hotel had the room ready on arrival. I was able to go in and get everything settled before exploring the city.

DSC00858-1.jpg

For this trip, I stayed at the Citizen M hotel. I found the hotel to be a bit pricey for what it provides, but the location kind of makes it worth it. This hotel is located in midtown and is walking distance away from many popular New York destinations, including Time Square and Central Park.

I think this is a given, but Time Square is an obvious must go destination for any tourist. It’s not my favorite place because it’s really just a bunch of billboards, advertising and retail stores but it’s something to experience for the sake of it. On the other hand, if you came to New York to shop, then this location does provide a lot of options.

From Time Square, it’s less than a 20 minute walk to Central Park. This park covers a lot of land and has plenty to see. If you’re committed to exploring the whole park, then this can be a whole day event. I went through the southwestern entrance and only made it about a quarter of the way into the park before stopping at the Bethesda Fountain. Right before the fountain is a bridge that is quite a nice location for photography.  

Central park is huge and has a lot to see. If you have the chance, I’d definitely recommend doing some exploring here. If you don’t want to walk the entire way, there are many alternatives such as renting a bike, riding in a rickshaw or even being pulled by a horse drawn carriage. None of this is free, but can be worth it.


Day 2

HHT01753.jpg

Day 2 was all about Brooklyn. I got my first experience with the NY transit system and actually got around to using it a lot this day. The Google Maps app was a lot of help. It provides different options as far as types of transportation and if you want to go with the public transit, it’ll provide you with directions to the stops and various transit times.  

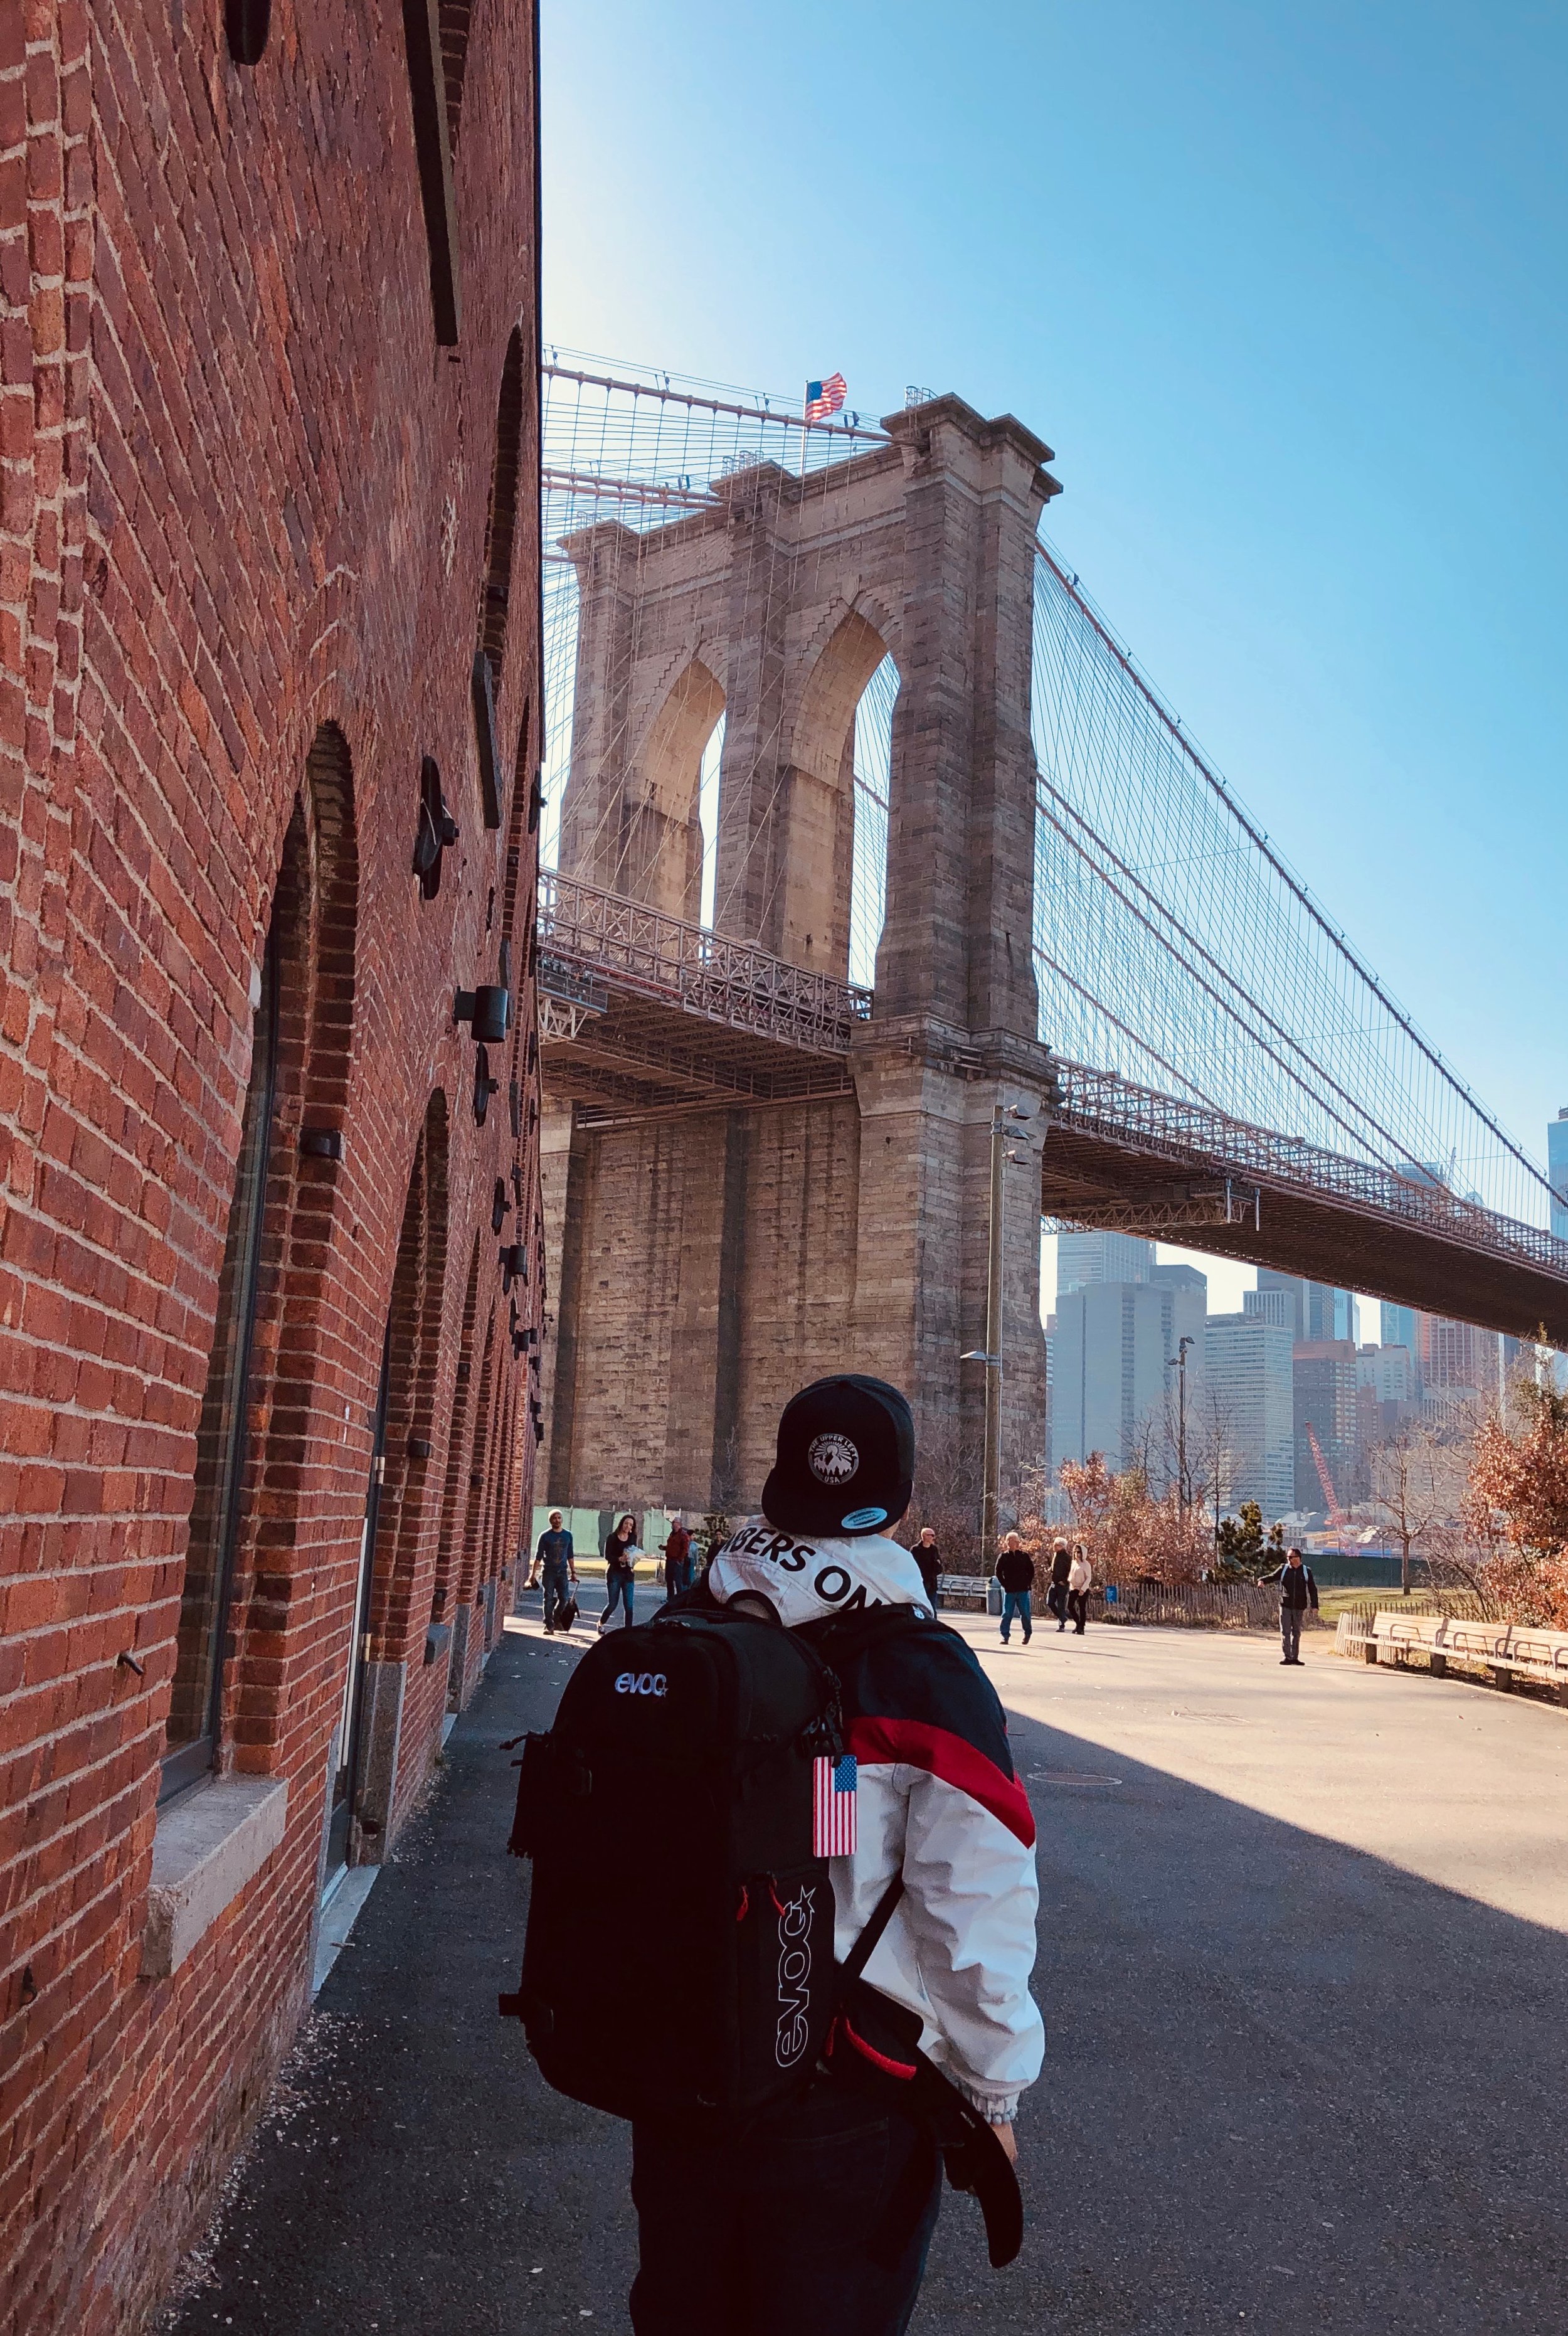
I took the subway all the way into Brooklyn. Another option would be to get off before the Brooklyn Bridge and walk the bridge into Brooklyn. This was the original plan because I wanted to get sunrise photos on the bridge but weather conditions just didn’t play along. Either way, I would suggest going early because the main photography hotspots get pretty busy.

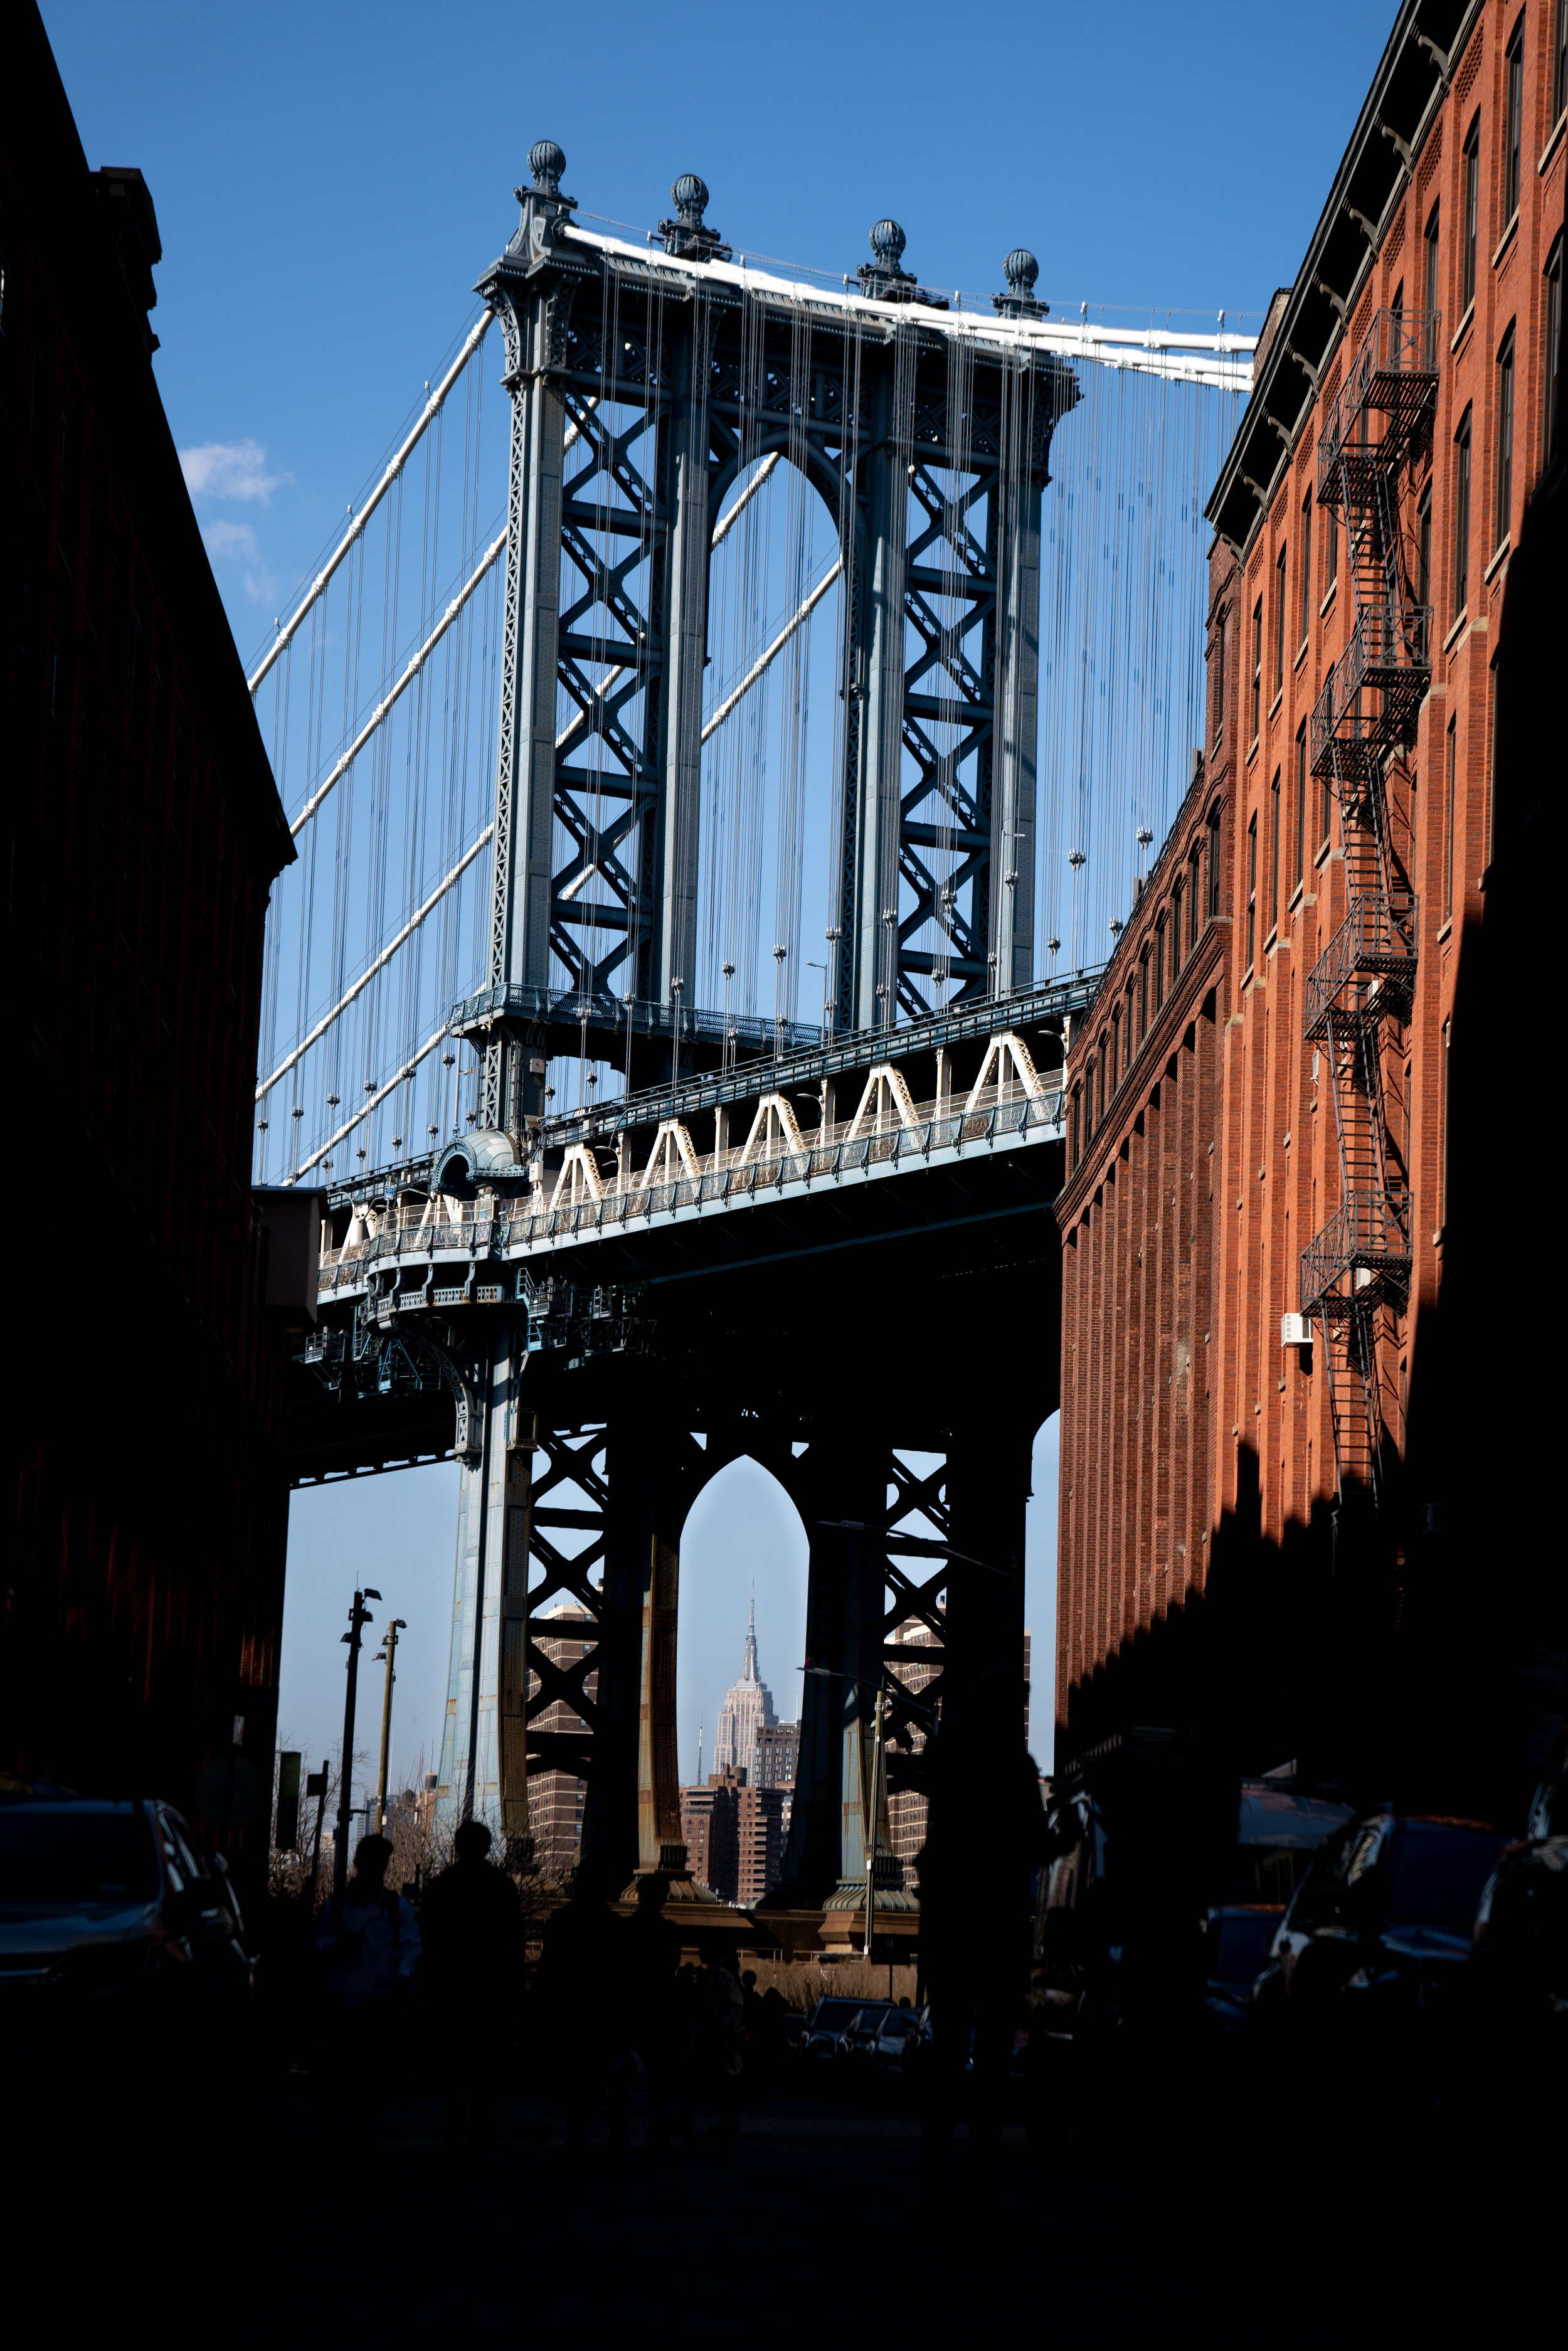
One extremely popular Brooklyn location is Washington St. because it has a direct view of the Manhattan Bridge. This place gets filled with people. If you want a better chance of getting an empty street, GO EARLY.

One thing that I’d notice was that most people are really only attracted to those really popular social media spots. Everyone wants the same photo so a lot of other locations are pretty dead. By walking around and exploring, you can find a lot of other really interesting locations and compositions. 

On the way back, instead taking the subway again, I tried NY’s ferry system. The cost is the same as the subway but provides a different experience that’s worth a try. Getting off the ferry, I headed towards my final destination for the day, Grand Central Station.

IMG_1274.JPG

In my opinion, Grand Central Station is not a beautiful photography location. It’s quite bland. The location is big and has some nice details, but as a whole, I personally don’t think it offers a lot.

Grand Central Station is also a guaranteed busy location. Remember, it is a functional subway station and also houses many retail stores so you’ll have to figure out how to deal with the amount of people there and how to use that towards your advantage.

While I was there, I came up with 2 different compositions but could only get one because I didn’t realize that one of my compositions required getting into a restricted area. My main idea for this location was to do a long exposure. With the amount of people moving through the station, a longer exposure can really portray that movement. When timed correctly, you can get some really interesting images. Unfortunately, the focus settings for my lens somehow got changed in between shots and only the first shot was focused where I wanted it to be. So in the end, I only managed to get one photo at this location.

DSC01149.jpg

Day 3

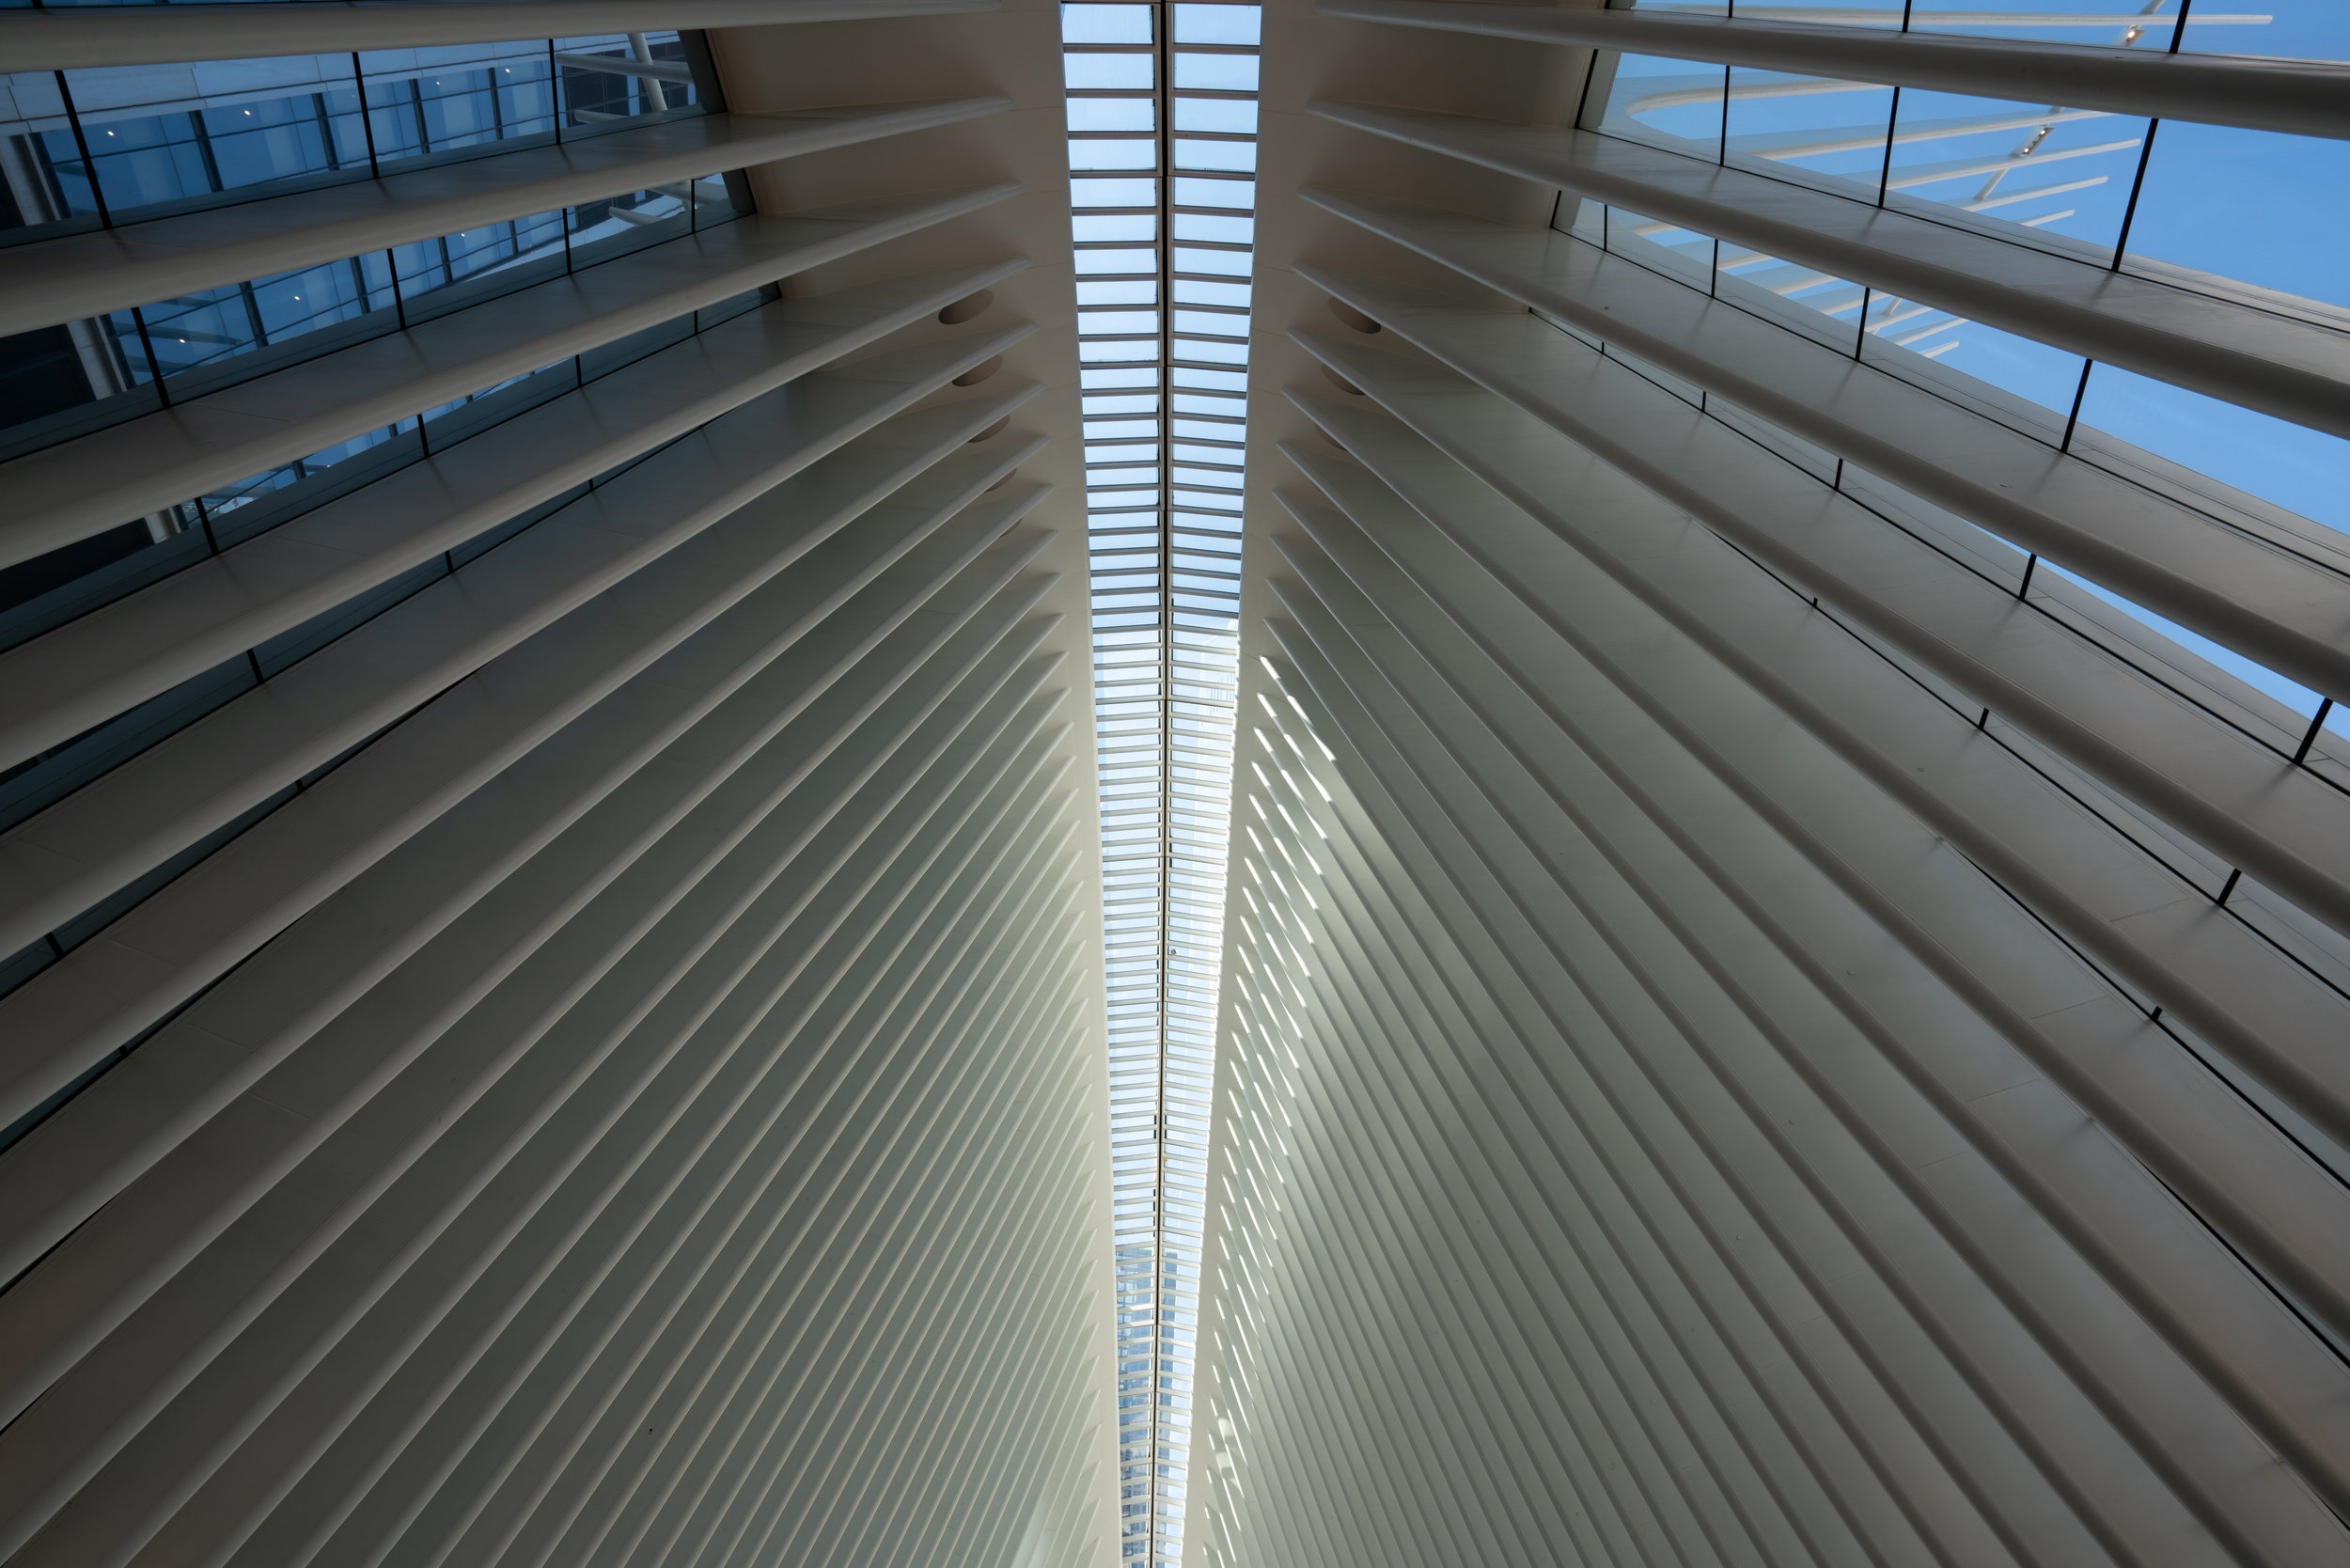
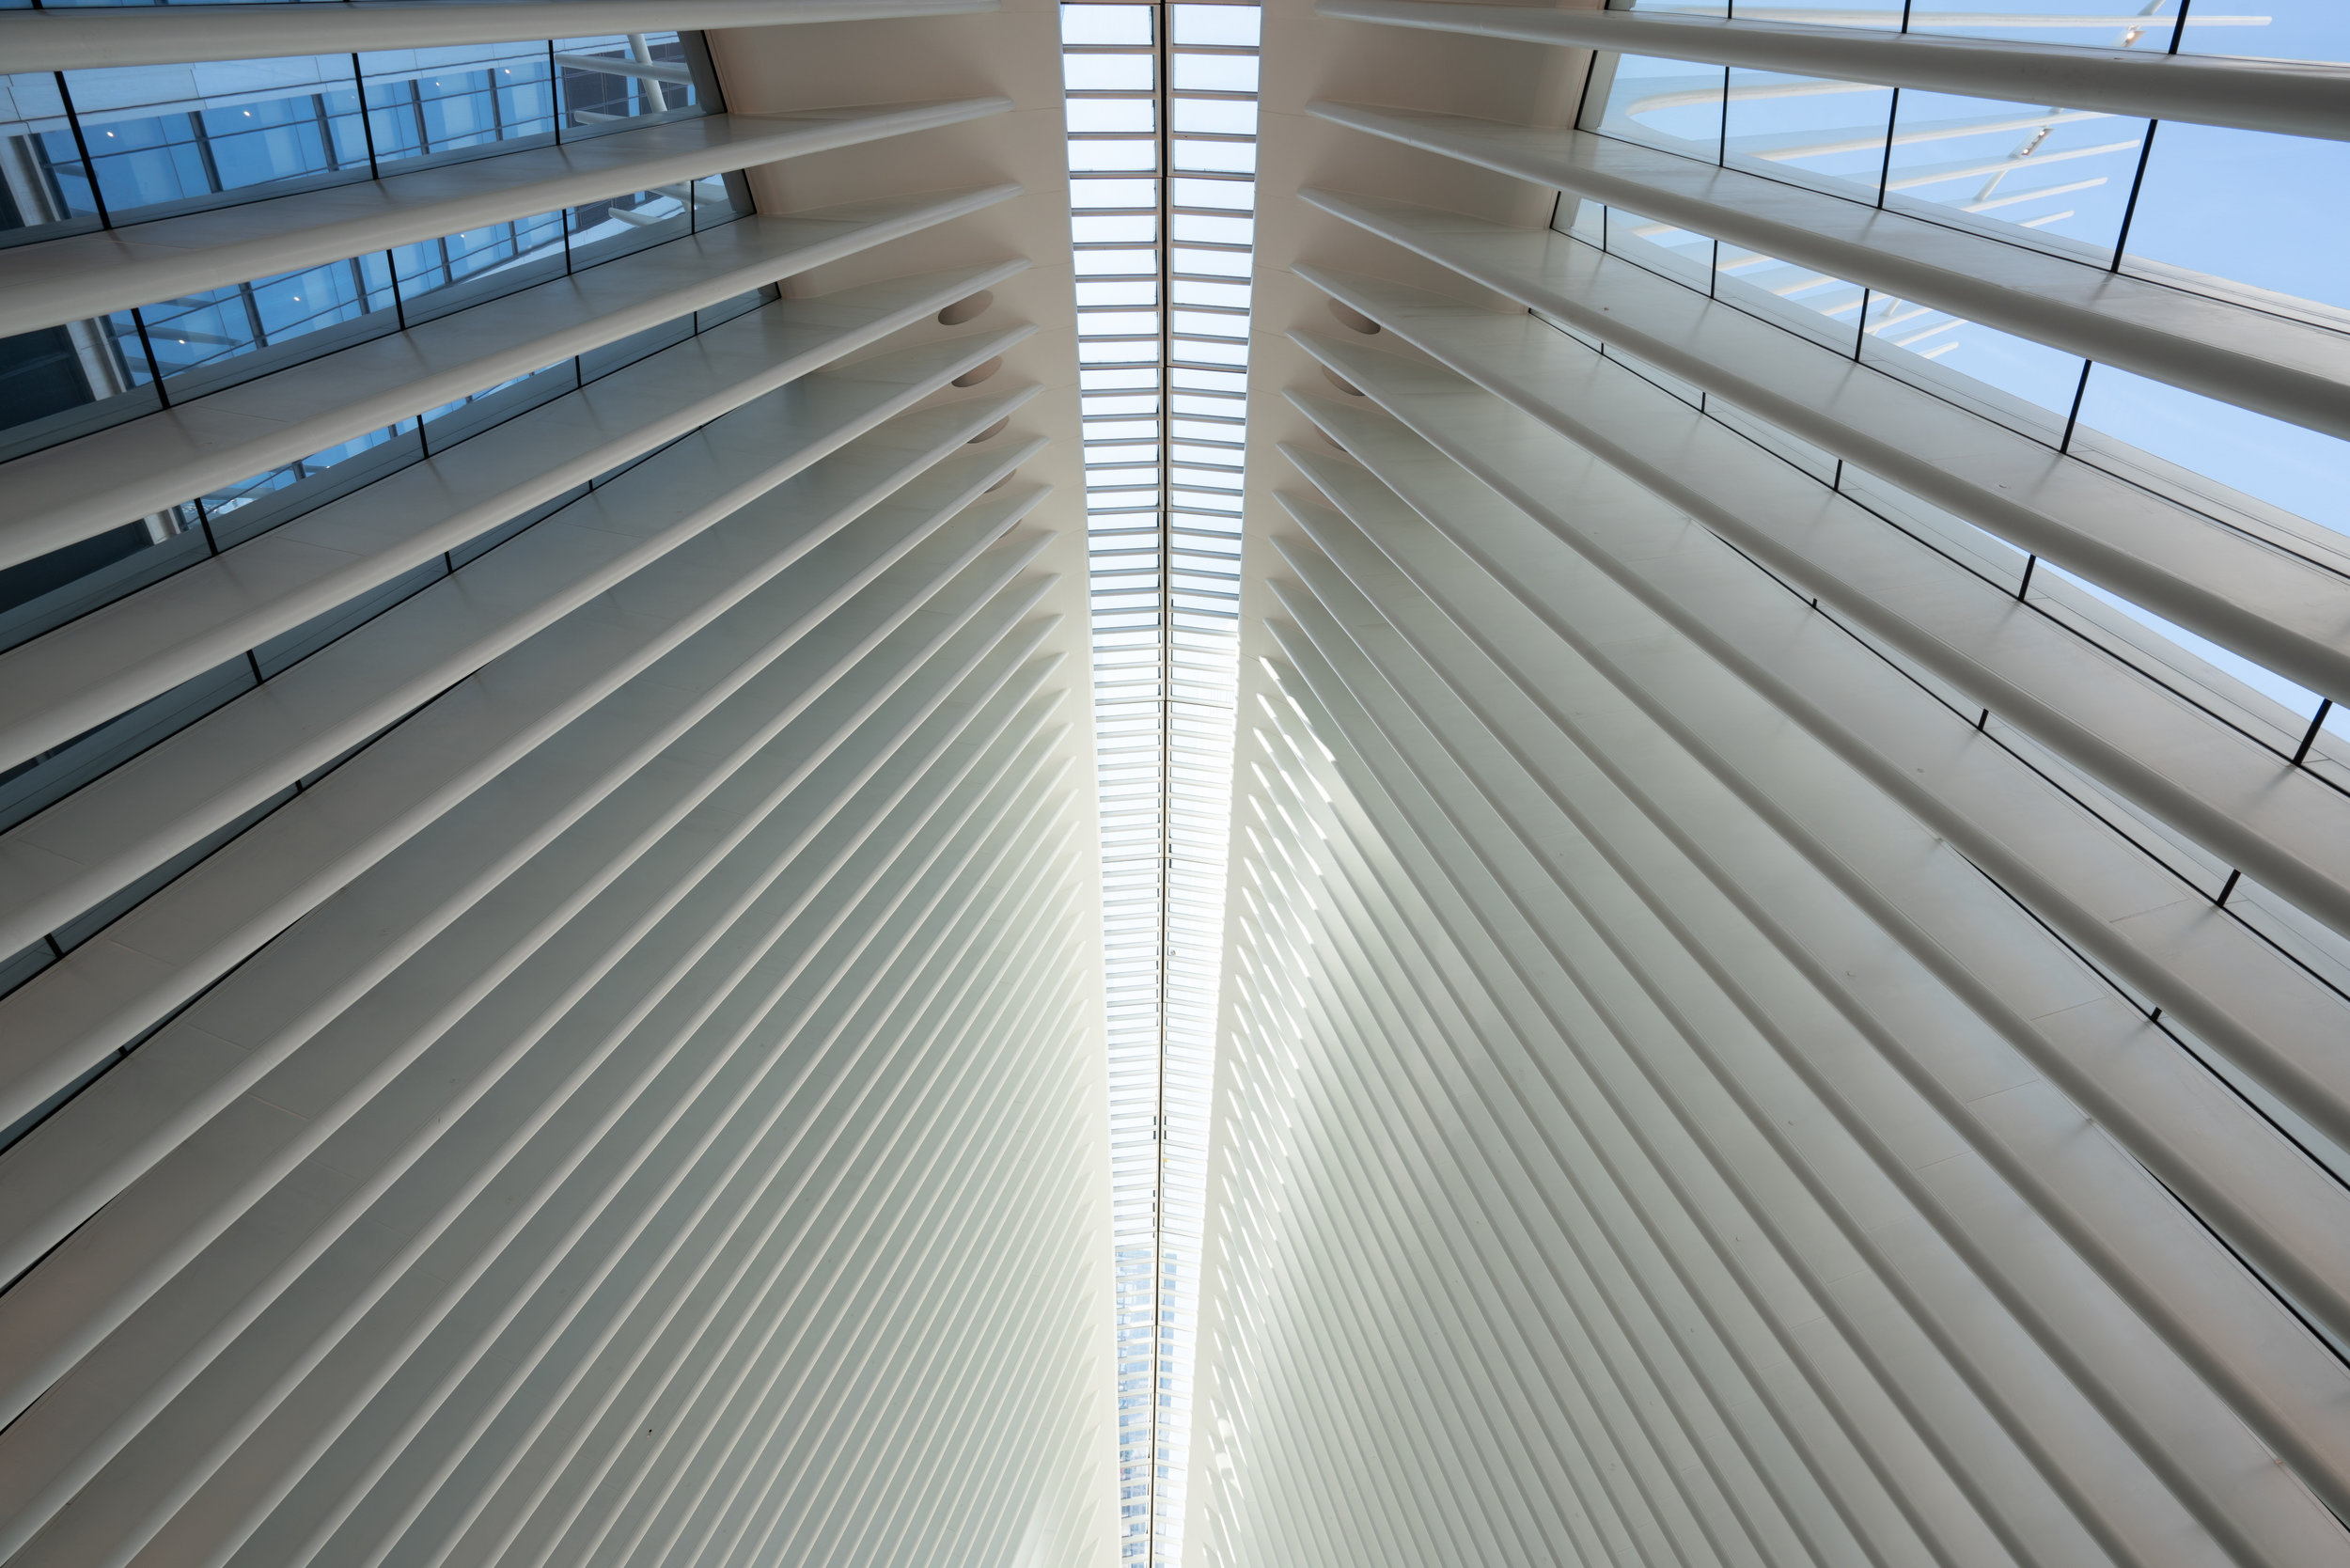
Without knowing it, I hopped on a train and got off directly inside the Oculus. This is a tourist hot spot because it is so well documented on social media. For those Instagramers who have a white theme going on in their feed, this is paradise.

DSC01160.jpg

I’m not one to hunt for cliches and shoot images that everyone else has, but I have to admit, this is one of those places that I’ve been wanting to photograph and get those basic photos for myself. I’m a big fan of symmetry and line work so a place like the Oculus is a no brainer for very obvious reasons.

Prior to visiting the Oculus, I didn’t do my research and thought that it simply was a structure for the sake of being a structure. Besides being an architectural marvel, the Oculus doubles as a shopping center which houses many higher end retailers.

At either end of the Oculus are balconies on the third floor of the building. These balconies are typically busy with people as they provide a location to shoot the centered photos that you are seeing in this post.

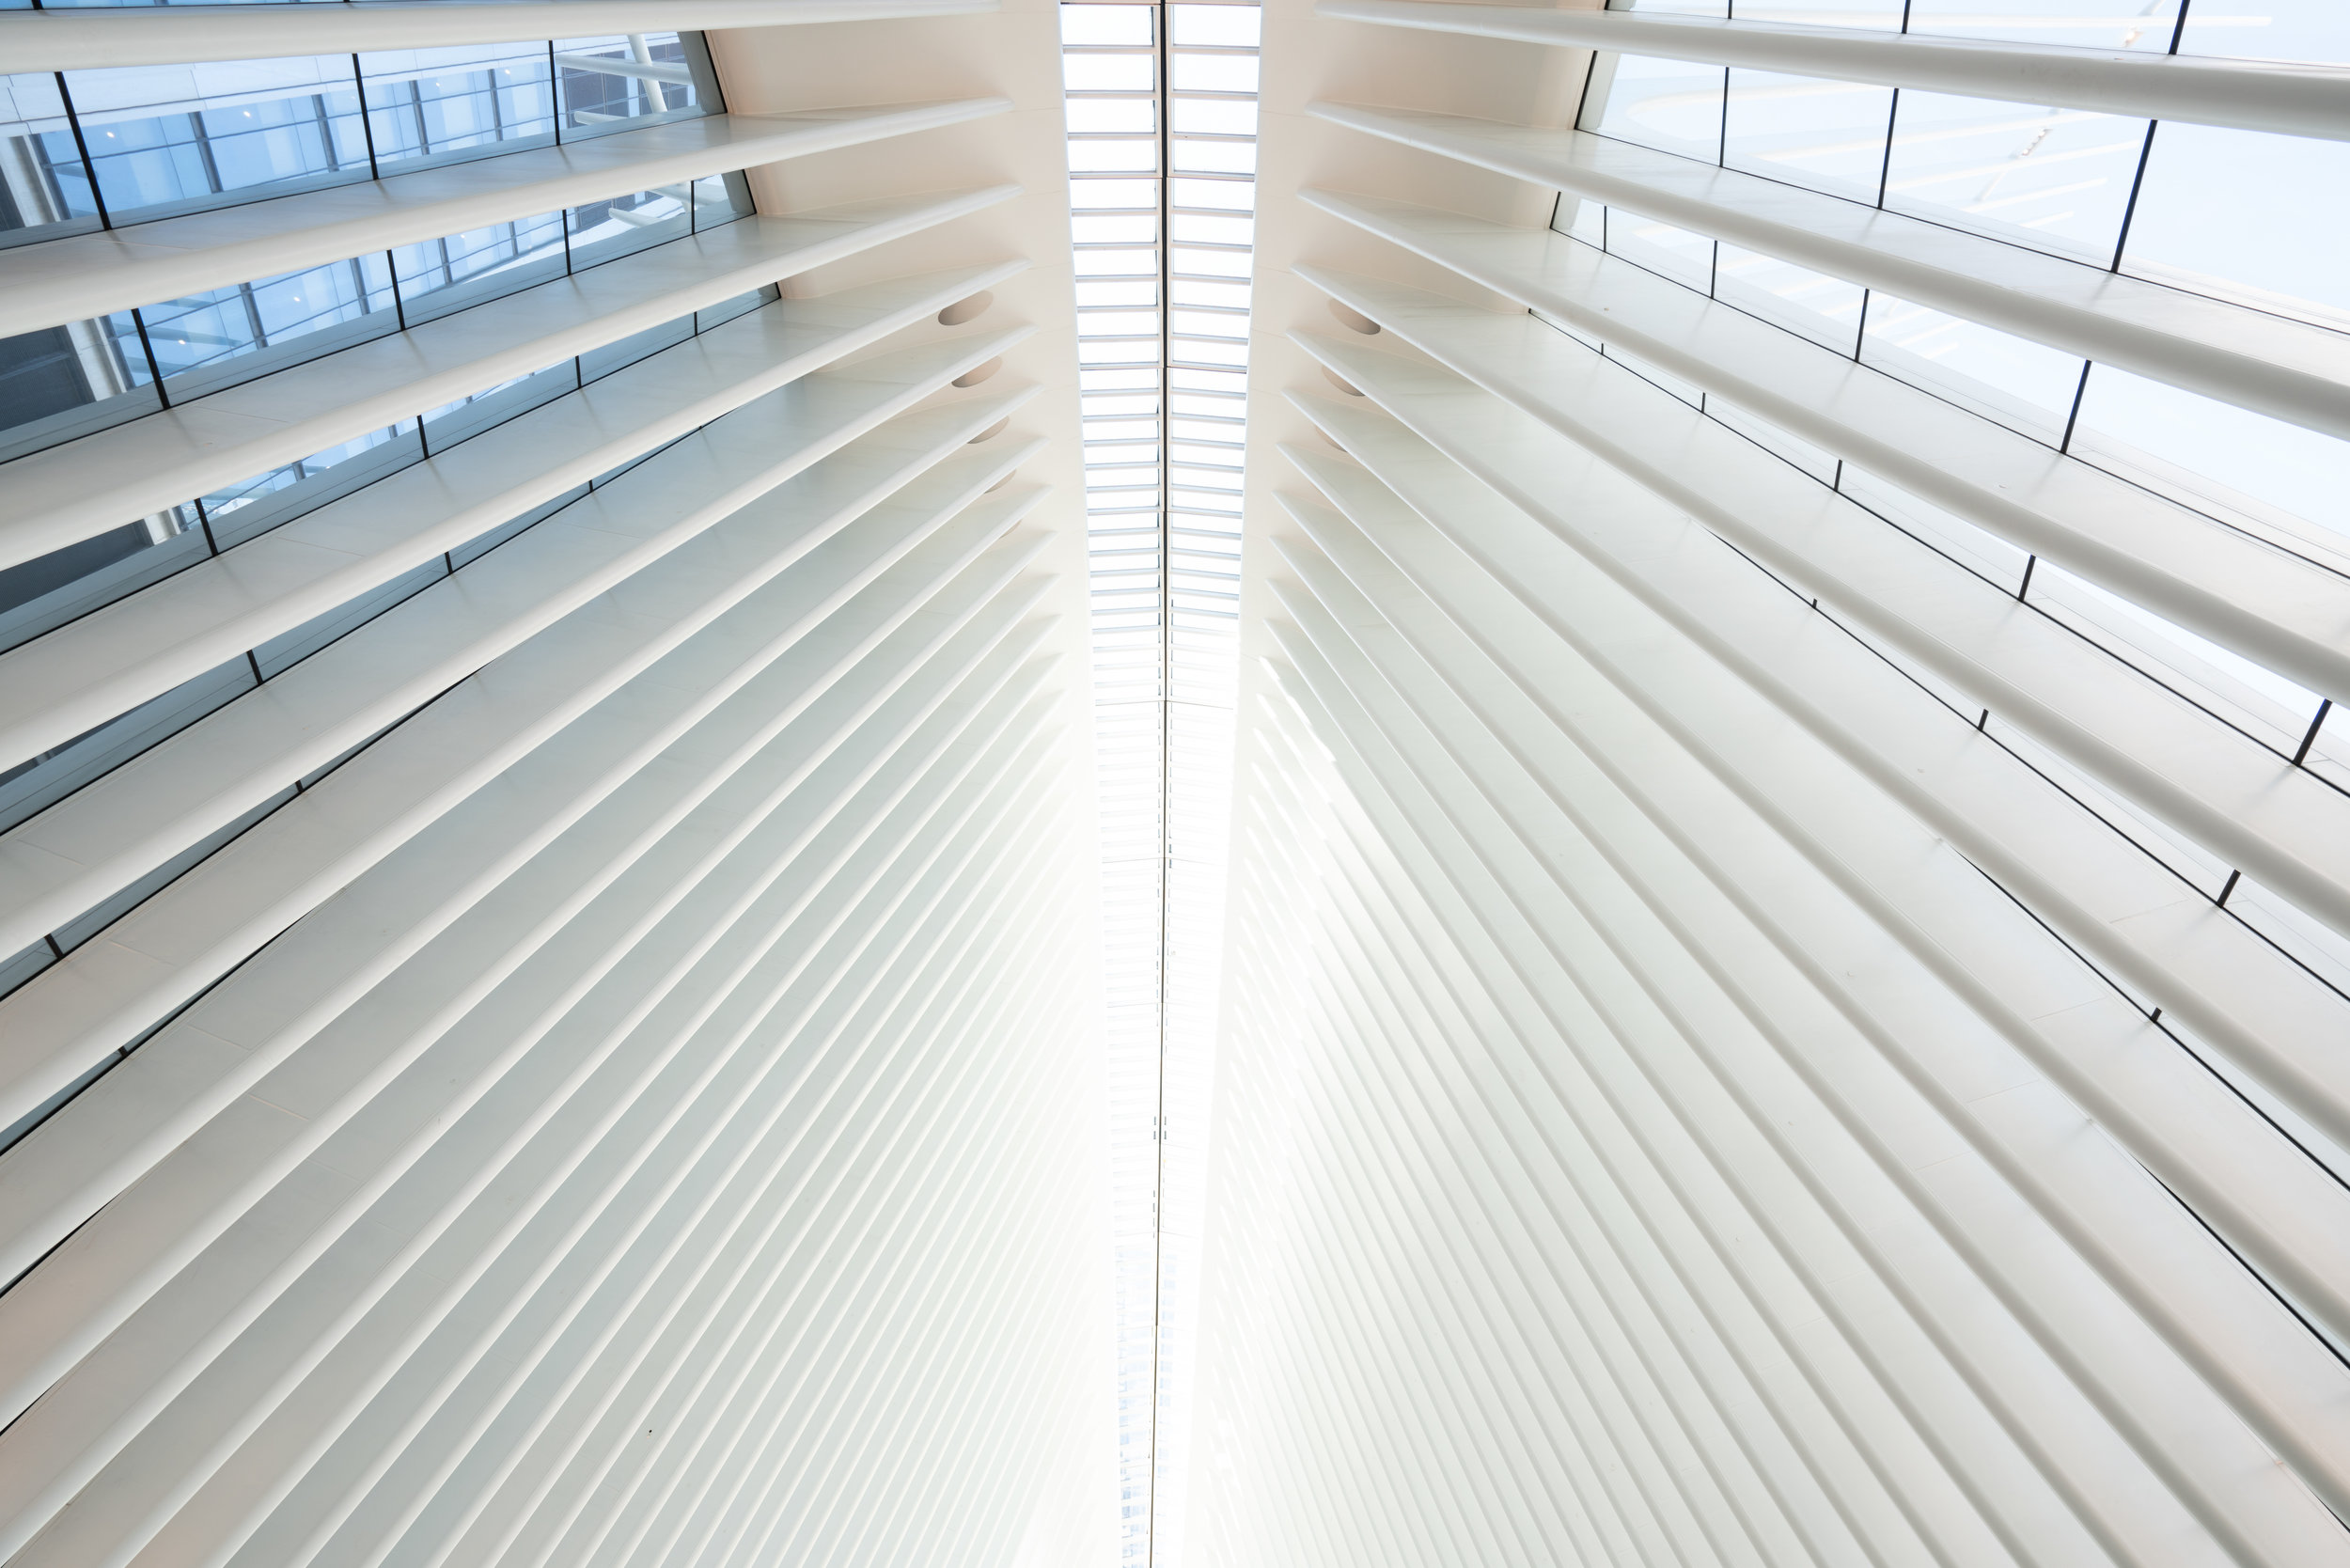
Of the images that I’ve seen of this location, they’ve always depicted what seems like a pure white building. This is not the case. The building is white to a degree, but not that sterile white lab coat feel that social media portrays.

Take a look at the examples that I’ve put together below. The first image shows what my camera thinks should be proper exposure. Then, 1 stop overexposed. Lastly, 2 stops overexposed. Obviously, the human eye will perceive the scene differently than how a camera will. I would say that, in person, the building looks somewhere between proper and 1 stop overexposed. Social media tends to go with the 2 stops overexposed and beyond route to make everything whiter than it actually is.

If you leave the Oculus from one of the balcony exits, you’d be led to the main World Trade Center area. This area is filled with street art and has a lot going on so it is definitely recommended to take a look.

Right across the street from the Oculus is the 9/11 memorial. This location commemorates the September 11, 2001 attacks with two square reflecting pools where the Twin Towers stood. Surrounding the pools are the names of those who lost their lives engraved in a stone plaque. If you happen to see a flower placed on the name of a person here, it’s there to celebrate that person’s birthday. In the near vicinity are other memorials recognizing the volunteers who also lost their lives in the attack.

For my last stop in the area, I decided to head to Battery Park. According to the internet, there is a free shuttle that takes you there but I was unable to catch it. I waited at the bus stop for some time but it never came. I saw it going in the opposite direction, but never at the stop that goes towards Battery Park. I eventually got tired of waiting and just took the normal city bus. This isn’t necessary because Battery Park is a relatively close walk from the Oculus. You can actually see the spikes of the building from the park. So if you’re willing to walk a few blocks, I would recommend to just do that rather than waiting on a bus that may or may not come.

DSC01185.jpg

If you’re in the area, I would say that battery park is worth a visit as it provides the best view of the Statue of Liberty from land. There are also various ferry tours from here that you can take to go to Ellis Island and to get a better view of the Statue of Liberty.

By the time that I was done with Battery Park, the sun was setting. I had to head back to the Oculus to catch the subway and was able to see the building in a whole new light. As the sun sets, you get very harsh shadows that settle on both the inside and outside of the building. This can help to create some very dramatic photos and something different than what everyone else has.


Day 4 / 5

IMG_1272.JPG

Day 4 was my last full day in New York. Unfortunately, it rained so I didn’t plan to do too much. I ended up just visiting the Museum of Natural History. This was my day off from photography and I didn’t even bother to bring my camera along.

To be honest, the Museum of Natural History was not for me. It’s essentially a museum full of taxidermy and artifacts behind enclosed exhibits. Many of what is on display is actually recreations. I was hoping for some more interactive exhibits but this was only really present in the Hall of Planet Earth. Here are different exhibits that can be controlled to show the effects of climate change along with other displays. At the museum is also a butterfly exhibit, which from what I saw, contained the only living animals. This costs a few extra dollars to see but was probably my favorite part of the museum. If I could go back, I’d probably skip this and go to an art museum instead.

Day 5 was a travel day. I was only in New York for a few hours before having to head back home. The plan was to wake up early and head to the Rockefeller Center and go to the Top of the Rock. It’s recommended to go early so I got my tickets online for the first time slot, which is 8am. When I got there, there were only a few people ahead of me in line but completely manageable. The only problem was that it was a particularly foggy day. When the doors opened, the workers mentioned that there was zero visibility at the top so we can either go up and essentially see nothing out of the windows or reschedule for another visit. I of course was leaving New York that day and had no immediate plans to return so rescheduling didn’t really help. I wasn’t able to get a refund because refunds had to be requested a week prior to the viewing date. I ended up just rescheduling for exactly one year (the longest allowed rescheduled time) but here’s a little hack. If you reschedule for a later date, you’ll technically be a week or more out from the viewing date and will then be able to get a refund. So, if you’re interested in going to the Top of the Rock, I wouldn’t necessarily recommend buying your tickets in advance unless you can absolutely guarantee good visibility on the day of. If you go early enough, you can still buy tickets at the door and there won’t be that many people there to have a hard time getting the view you want.

While you’re in the area, I would also recommend checking out the Rink at the Rockefeller Center. This is a famous ice skating rink that is often shown in TV shows and movies. A few blocks away is also St. Patrick’s Cathedral. This is a prominent New York landmark and is worth a visit as it contains some beautiful stained glass windows and great religious iconography.


This is essentially my New York trip in a nutshell. It was a fun and different experience from what I’m used to doing. Hopefully, I’ll get the chance to pay another visit in the future.

If you have any questions, feel free to leave a comment and ask! I’ll do my best to give you a helpful answer.


Want to support my work?
Consider visiting the shop and buying "Absolutely Nothing"
https://www.TheUpperLeftUSA.com/shop/absolutely-nothing

or

Become a Patron!
https://www.patreon.com/HaiHoangTran

Wallace Falls State Park Trail, WA


I recently had to opportunity to hike the Wallace Falls trail for the first time and I have to say that I enjoyed it quite a bit. This is one of those trails that offers a lot in a short amount of distance because it just seemed like there were views around every couple of corners.

IMG_8317.jpeg

For those who are interested in doing the hike, going early is a definite recommendation. I arrived at the trailhead at 8 am and there were about 20 cars in the parking lot. As I hiked, I saw many people on the trail and by the time that I was finished, a good portion of the parking lot was filled. I did this hike on New Year's Eve, which is something that not as many people are going to do. I can only imagine that on a nice summer day, parking is going to be taken up fast. There is no roadside parking on the way to the trailhead so you'll have to find parking elsewhere in the surrounding residential area. Parking in the lot also costs $10 a day or $30 a year for the Discover Pass, which will allow you to park at various other state parks. Those who do not pay for parking may be fined at this location as there is a volunteer actively on site.

For those who are also new to this trail, there are multiple sites and waterfalls that you can hike to. On this day, I only hiked to lower falls so take that into consideration as you read this blog. That being said, the hike to lower falls is relatively easy. A more experienced hiker or someone with good cardiovascular endurance should have little problem. I would like to note that there was a little girl less than 5 years old that I saw throughout the trail walking on her own. That kind of tells you about the difficulty of this hike. To me, it seemed like there was not a lot of elevation gain. More so smaller patches of incline climbs rather than a constant climb. 

You start off at the trailhead and walk down a gravel road that’s directly under those electrical towers that you often see randomly running through the mountains. This was actually my first time being this close to those towers and to my surprise, you can actually hear the electricity running through them, which is kind of crazy! After this, you enter the rain forrest and stay there for the remainder of the hike.

IMG_8269.jpeg

One nice thing about this hike is that you walk along a moving body of water for a good portion of the hike or relatively close. You can hear moving water for the entirety of the hike and that just adds to the mood of the trip.

Conditions on this particular day were great. It had been raining consistently for the past couple of weeks and this was an unusually good weather day. I was layered up pretty well and stayed warm throughout the hike but my hiking partner did complain about being cold and losing sensation when not in motion. Keep that in mind as you plan your trip! Another thing that would be helpful is to bring a waterproof layer because there were a lot of water droplets falling from the trees even on a nice sunny day. If you're going on a wet day, bring waterproof gear for sure.

IMG_8290.jpeg

I can’t gaurantee that this is the norm for this trail but I experienced some amazing light throughout this hike. As the sun rose, it lit the tree canopy on fire and often put on a display of light beams through the trees. This got me pretty excited and I tried my best to capture an image as it was happening.

IMG_8285.jpeg

Overall, this is definitely a recommended hike. There is a lot of reward for the amount of effort put in, even if you don't do the entire hike. 


Want to support my work?
Consider visiting the shop and buying "Absolutely Nothing"
https://www.TheUpperLeftUSA.com/shop/absolutely-nothing

or

Become a Patron!
https://www.patreon.com/HaiHoangTran