Jobo CPE2 Plus | Is a Jobo worth it?

If you’re into home film development, you’ve probably heard of the name Jobo. For those that haven’t, this is one of the Jobo variations. This is my personal Jobo CPE2 Plus. 

C0117.jpg


For those new to film development, some developing process requires strict temperature management. By this I mean that the chemicals need to be held at a very specific temperature and this is where a machine like the Jobo comes in. 

s-l1600-2.jpg

There are many variations to the Jobo machine. Some are very manual and are essentially just rollers and require you to do all the work. Some are fully automatic. You just press a button and don’t have to worry about a thing. Most people are going to buy a machine that falls in the middle, like this CPE2 Plus. Machines like the CPE, CPA, and CPP essentially do two things, they allow you to keep your chemicals and tank at a certain temperature via a water bath and the machine agitate the tank for you at a predetermined speed. These two factors contribute to consistency because if you were to do these things  manually, human error can effect the final result.


This leads me to the topic of this post, is a Jobo worth it? Well, like most things in life, the answer isn’t so black and white or straight forward. The answer is pretty much yes and no. I want to share with you my experiences with using a Jobo and you can determine for yourself wether or not it’s worth it, if you are interested in picking one up.

In my opinion, you have to be developing a lot of film for a Jobo to be worth it. I picked my Jobo up from eBay for a little under $600. This machine was new old stock meaning that although it is old, it has never been used. As the name indicates, CPE2 is the second version. Current models are CPE3 and CPP3. The CPE line is generally smaller with slots for 4 chemical containers and graduated cylinders instead of 6 in the CPP. The CPP are intended for the larger drums, but you can get quite a bit done with the CPEs.

Newer machines can range from $1700 to 3800 give or take depending on whether or not you’re going to be using a Jobo Lift or not. The lift costs around $600 and further adds to the consistence trend of the machine. These prices are of course only for the machine. You still have to buy the proprietary tanks. The tanks also need magnets or cogs to be used with the machine. The point is, there is a lot of stuff to buy and it’s all pretty expensive. Like I said, you have to be developing a lot of film, really care about consistency in film developing or you have some money to blow for this machine to be worth it.

Screen Shot 2017-10-26 at 6.04.52 AM.png

At the end of the day, owning Jobo like this doesn’t make film development effortless. You are still attached to the process. You still have to pay attention to development times, switch chemicals and clean everything. This is not an automatic machine. Like I said, the only thing that this machine really does is keep temperatures steady and agitate your drum. When I consider things in this regard, it’s almost clear in my mind that a Jobo is not worth it. That is why I’ve made videos on my YouTube channel (YouTube.com/TheUpperLeftUSA) showing alternatives to this machine that gets you similar results. Don’t get me wrong, having a Jobo is nice, but it is a luxury and is kind of over the top. It is not necessary. Most people hand develop in a sink and they get good results. Don’t think that you absolutely need this. To me, this should be the last thing that a film shooter should pick up. Try manually processing for awhile and see what kind of results you can get. If you feel that you are getting mediocre results, maybe send a couple rolls in to get them professionally developed and compare to your results. Try other alternatives first.

Check out these two videos where I've shown cheaper alternatives to the Jobo that I've come up with.

If you're considering on buying any of these products, please support my work by using the links below.

Anova Culinary Sous Vide Precision Cooker WIFI + Bluetooth
http://amzn.to/2xROXyw
Anova Culinary Sous Vide Precision Cooker Bluetooth
http://amzn.to/2za0aMy
EVERIE Sous Vide Container 12 Quarts
http://amzn.to/2zvwtby
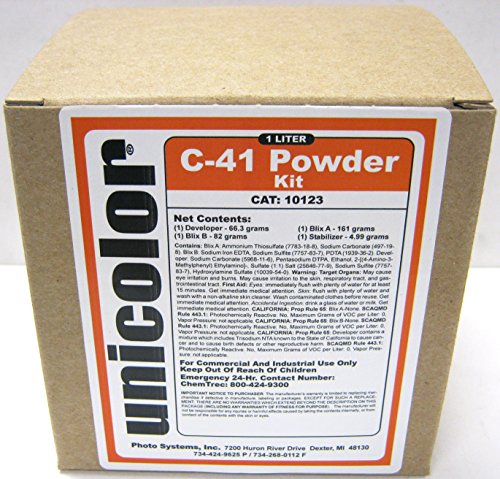
Unicolor C-41 Powder Developer Kit
http://amzn.to/2Ad0A4O
Ivation Foot Spa Massager
http://amzn.to/2xknBoA
Cibachrome Motorized Roller Base / other motorized roller bases


Want to support my work?
Consider visiting the shop and buying "Absolutely Nothing"
https://www.TheUpperLeftUSA.com/shop/absolutely-nothing

or

Become a Patron!
https://www.patreon.com/HaiHoangTran

Nikon 50mm f/1.8G vs Nikon 50mm f/1.8D

If you’re in the market for a cheap Nikon lens, then I’m sure you’ve considered between the Nikon 50mm f/1.8D and Nikon 50mm f/1.8G. These are the two cheapest full frame primes lenses that Nikon currently produce. The 50mm f/1.8D retails for $134.95 and 50mm f/1.8G retails for $219.95. So, what makes the 1.8G cost $85 more and is it worth it?

First, let’s look at the size. In terms of specs, they are very similar in both size and weight and are definitely among the smallest lenses in terms of the Nikon lens lineup. When I was considering one or the other, I didn’t really care about the weight because they are too close to really tell when the lenses are held in hand. I also didn’t really care about the width either. The only thing that I cared about in terms of size was the length of the lens because I was looking for a small all-purpose travel lens. The specs indicate that the 1.8G is only .6 of an inch longer but when you see them side by side, that .6 of an inch is a lot more than you would expect. So in terms of size and weight, the 1.8D is the clear winner. 

A lot of the 1.8G’s size is attributed to the fact that it has the Nikon AF-S or Silent Wave Motor built in. 

This leads me to my next point, autofocus noise. The AF-S in the 1.8G allows it to autofocus much more quietly than the 1.8D. Realistically, if you were outside and there is background noise from the city, no one’s going to be able to hear either lens, but if you were in a quiet environment, the autofocus in Nikon D lenses stick out like a sore thumb. 

One thing worth mentioning is the fact that the AF-S will be a major determiner for many people. Because the 1.8D does not have a focusing motor built into the lens, many of the cheaper bodies will not be able to autofocus with this lens. Make sure that your camera body has an internal focusing motor or it will not be able to autofocus with this lens. You can tell if your body has this feature or not by the screw drive on the lens mount. It corresponds with this female screw on the lens and turns it to autofocus.  

One thing that I really like about Nikon G lenses is that they have autofocus with manual override. This means that even when you are in autofocus mode on the lens and you turn the focusing ring, the lens will allow you to manually focus. On D lenses, if the camera body is switched to autofocus and you turn the focusing ring, there is resistance on the ring. You can still turn the ring and force the camera to manually focus, but it just doesn’t seem like it’s good for the lens or the body. 

Lastly, let’s talk about image quality. Here are various sample images taken from each lens for you to determine for yourself which you like better. All images are unedited raw files converted to jpeg and taken with the Nikon D810. These images are by no means meant to be award winning but just taken at various apertures to show what the lens can possibly produce.


Honestly, I think that images quality is a toss up between these two lenses. They are very similar and if I had to do a blind test to determine which picture came from which lens, it’ll probably be a 50/50 guess. One thing that I would say is that the 1.8G does seem to transmit about 1/3 of a stop more light, but that can very well have just been a variation in one of these lenses and another copy of either lens could transmit more or less light.

After everything that I’ve talked about, if I were to go back and buy one of these lenses again, I would go for the 1.8D. I will say that I like the 1.8G better because it is quieter and I like the option to have the manual focus override, but the price difference just does not justify the purchase to me. When I bought these lenses, I got the 1.8G for $174 new. I’ve seen he 1.8D go for $90 new quite often but I actually purchased mine used from Offerup for $60 and it is in near mint condition, no scratches and functions perfectly. I just think that the 1.8D offers much more value for the money and if it is compatible with your camera, I would recommend you save some money and pick it up rather than the 1.8G.

If you're considering on buying one of these lenses, please support my work by using the links below.

Nikon 50mm f/1.8G
http://amzn.to/2wRCae4
Nikon 50mm f/1.8D
http://amzn.to/2wRHSN6


Want to support my work?
Consider visiting the shop and buying "Absolutely Nothing"
https://www.TheUpperLeftUSA.com/shop/absolutely-nothing

or

Become a Patron!
https://www.patreon.com/HaiHoangTran

ConGRADulations

Yesterday, I got a last minute phone call to do a surprise graduation photoshoot. This was really out of nowhere as I was expected to do the shoot within a few hours of the inquiry. This isn't exactly ideal but I felt that it was better to do the shoot on the day of the graduation, rather than another day as it would be a hassle for the graduate to get dressed, have makeup redid and everything that associates with getting ready for graduation day.

For this shoot, I decided to rely on my Sony A7Rii and the Sony 24-70mm f/2.8 GM. The shoot was to be taken at the University of Washington, Tacoma campus. Interestingly enough, I've lived around the area for a good portion of my life and pass by the campus all the time but have never actually stepped foot on it. 

UWT is an interesting campus. It is very much so a part of the city and not just because it is located in arguably the busiest part of downtown Tacoma, but because some of the classrooms/campus is literally a floor above various stores and businesses. If I'm not mistaken, the UWT school gym is actually the Tacoma YMCA.

Needless to say, certain aspects of the campus is very cramped and there isn't much room to move around for photos. Considering that the campus is small, there weren't that many distinctive features that I could've used as a backdrop or to add to the photos. With all of this in mind, I felt that a 24-70mm lens would be best because this would allow me to go from wide to medium telephoto.

If you've ever seen a UW alum's graduation photo, you would know that it's kind of a tradition to take a photo with the giant W on campus. To keep up with tradition, we decided to make the W the first location for the shoot.

On this campus, the W just happens to be right next to an active city street, literally a few feet away. The 24-70mm was definitely the right choice because I wanted to make sure that I got a picture with the entire W in frame.

Next, was to get some detail shots. I personally feel that detail shots have a place in any photoshoot. There is always something that you can get close up shots of and sometimes this can be very rewarding.

We of course can't forget about photo's of the graduate! As you can see, the photos consist of headshots and group portraits. The graduate's family is most likely going to be there so why not include them in the shoot? This kills some time and gets everyone involved. I feel that this helps to justify your rate for the shoot because they are getting more out of it.

At the end of the day, it is all about making your subject look good! The client enjoyed the photos and that's all that matters.


Want to support my work?
Consider visiting the shop and buying "Absolutely Nothing"
https://www.TheUpperLeftUSA.com/shop/absolutely-nothing

or

Become a Patron!
https://www.patreon.com/HaiHoangTran

Sometimes you have to alter reality to paint a prettier picture.

Photography is a lot of hurrying up and waiting. You get ready, get to the location early, and wait. There are a lot of variables that goes into a "good" picture. 

Looking at the picture above, you might think that it's a fairly simple picture. Just raise the camera, hit the shutter, and call it a day. This picture actually took WEEKS to make.

I've been attracted to this building for some time now. I liked the symmetry of the building and the flagpole in front of it. I've been doing a lot of walking just for the hell of it and this has been on my route for a few weeks.

The first approach was the obvious one, just go to the location and take the picture.  There are a lot of problems with this approach. First, I live in Washington so weather is always a thought. The weather has been fairly good for the last few weeks so all I really needed to wait for was a day with nice beautiful clouds and a good enough breeze to blow the flag. These two things were critical in my opinion.

The next aspect was to get an interesting foreground. I was looking for either interesting people or a nice car. The problem here is that this is Lakewood, so there aren't too many exotic cars around. This is also not a very busy street so it took some time between seeing people walk across the scene. All of this meant that there was a lot of waiting around. 

As you can see, the final picture was actually composed up of three seperate pictures. Each of the three photos was actually a part of a series that consisted of 10+ photos. In the original concept, I only planned on having one foreground subject but with a little bit of foresight, I was able to come up with the final image. Once I took the photo of the man looking back, I knew that I needed something else for the man to look at. Once I had the foreground, all I needed was the perfect waving flag. 

When I had all the elements, it was just a matter of putting the composition together. This isn't a photoshop tutorial so let's just say that there was a lot of layer masking to get all the elements in place. 

In the end, we have a picture that, although looks simple, tells more of a story as a whole than any of its one part.

This is not a technique that should be abused unless you want to specialize in this type of photography. You don't want to rely on this technique to the point that it becomes a crutch because "you can always use photoshop". It's always better to get it in camera with one shot because it can save you a lot of time and effort, but when that is not really possible, composite the image.

This is an extremely useful skill to know so I would recommend trying it for yourself! Go out, take pictures, and have fun.


Want to support my work?
Consider visiting the shop and buying "Absolutely Nothing"
https://www.TheUpperLeftUSA.com/shop/absolutely-nothing

or

Become a Patron!
https://www.patreon.com/HaiHoangTran

Sony Sonnar T* FE 55mm f/1.8 ZA Lens

The Sony 55mm f/1.8 lens has to undoubtedly be the most underrated Sony E-mount lens in my collection. If I remember correctly, this was actually the first lens that I purchased when I got into the Sony system. I bought it, very shortly after bought the Sony 28mm f/2, and then the 55mm f/1.8 was put into storage for the last two years. 

I didn't put the 55mm f/1.8 away because it was lacking in any sense. This is quite possibly the sharpest Sony lens that I own. It definitely is if you consider DxOMark standards. According to DxOMark, the Sony 55mm f/1.8 is currently the third sharpest lens in the Sony lens lineup (https://www.dxomark.com/lenses/brand-sony/mounted_on-Sony_A7R_II-1035/launched-between-1987-and-2016/mount_type-Sony_FE/focal-from-1-to-1500/aperture_max-from-0.95-to-45/launch_price-from-0-to-13000-usd/sensor_brand-Sony#hideAdvancedOptions=false&viewMode=list&yDataType=rankDxo).

I orginally put the 55mm f/1.8 into storage because I was at a point in my photography career where I needed a wider prime, hence purchasing the 28mm f/2. 55mm was simply too narrow for my everyday work. I do a lot of photography in crowded locations and 55mm would mean getting a lot of tight headshots and that was just not what I was looking for. 

When I shoot film, I only use 50mm lenses. This isn't because I prefer the 50mm focal length, but simply because the lenses are cheap and it's the only focal length that I own for the Nikon F3. Because I was, in a sense, forced to use only 50mm lenses, I've gotten quite accustomed to them. Framing is predictable and results are repeatable. This made me want to try the Sony 55mm f/1.8 again, just to see if I enjoy it as much as with film.

To test the lens out, I decided to head to The Needle Lounge in Lakewood, Washington to get some tattoo photography. This has really come to be my standard for testing camera gear. To me, this setting provides me with more real world conditions than shooting test charts and still life. 

The shop is adequately lit but lighting is still difficult and not perfect. Usually when the artists tattoos, they have a light overhead to help light where they will actually tattoo. Because the light is so close to the tattoo and artist, it is extremely contrasty and sharp.  

One of the reasons to buy the 55mm f/1.8 is of the course the f/1.8 aspect of the lens. A large aperture to get that narrow depth of field. In this type of setting I wouldn't really shoot wide open because I want a bit more depth of field to get various aspects of the scene in focus, but did so just to change things up a bit. 

Looking at the pictures below, you can get a sense of how narrow the depth of field is at f/1.8. Focus is fading from one finger to the next. Where the focus is on the machine tip, the center of the Aztec calendar tattoo is already starting to be blurred because it's on the curve of the client's deltoid. 

One of my favorite things about using 55mm in general is that it is very close to the magnification of my eyes. This means that when I raise the camera to my eye, the image replication size is almost 1:1. This makes framing even easier than with a 50mm lens. 55mm is still a few mm short for my eyes but I think this is as close as I'm ever going to get. 

I also really enjoy the contrast and colors on this lens. Reviewers like to talk about the Zeiss "3D pop" and if there is such a thing, this lens has it. To me, the picture below is the perfect example of this pop. Just look at the client's face and the separation from everything else. It's as if there is that extra dimension that really makes the image pop. 

Overall, this is a pretty amazing lens in use. If you're looking for a standard focal length prime lens, I would highly recommend you check this one out. It is very sharp, capable, and well suited for really anything. It is currently mounted on my A7Rii and I feel like it's going to be on there for awhile as my main everyday walk around lens. 


If you're interested in this lens, please consider purchasing it by using the provided links.

Amazon - http://amzn.to/2s7mdTp


Want to support my work?
Consider visiting the shop and buying "Absolutely Nothing"
https://www.TheUpperLeftUSA.com/shop/absolutely-nothing

or

Become a Patron!
https://www.patreon.com/HaiHoangTran