Sirui Swift P1 First Impressions

I’m excited to bring you another exclusive first look at a soon to be released Sirui product. I recently received a pre-production unit of the Sirui Swift P1. This is an electronic gimbal and I would classify this as one of those do it all gimbals because it’s designed to work with a variety of devices. This gimbal can be used with mobile phones, mirrorless cameras, compact cameras, and even comes with an attachment to mount actions cameras like a GoPro or something similarly shaped. The P1 has a max load of 900g/1.98lbs so it should be able to accommodate a decent sized setup.

ASSASSIN_S005_S001_T026.jpg

Typically for something brand new like this, I like to do an unboxing to give you guys an idea of what to expect but like I said, I received a preproduction unit which came with no packaging or paperwork. All the pieces were crammed inside of a soft carrying case, which according to what I’ve seen is not the official case that buyers will receive. Everything was also packed inside of a box made for something else so I didn’t think it was worth showing and possibly confusing anyone.

That being said, because my P1 didn’t come with any manuals or other information, today I’d like to just give you a first impression of this product and go through it to the best of my abilities. Everything that I’m expressing will be based on my time playing with the P1 and the information that I’ve been able to find on the internet. I’m sure there will be things that I’ll leave out but it is what it is. I’ll just have to play with this thing, wait for some more information to be released and then I’ll be able to come back with a proper review. So, let’s get started.

If we look at the design of the P1, it looks very similar to the Sirui Swift M1 that I recently showcased. The big difference is going to be the exclusion of the folding design of the M1 which minimizes the size for travel. To be honest, I’m glad that the P1 doesn’t include the folding design. If you saw my M1 video, you’d know that I’m not a fan of it and actually think that it’s flawed. The P1 may be a bit bigger when not in use, but I’d rather take that trade off to save myself from the headache that is the M1’s folding design.

Sirui Swift P1 First Impressions.jpg

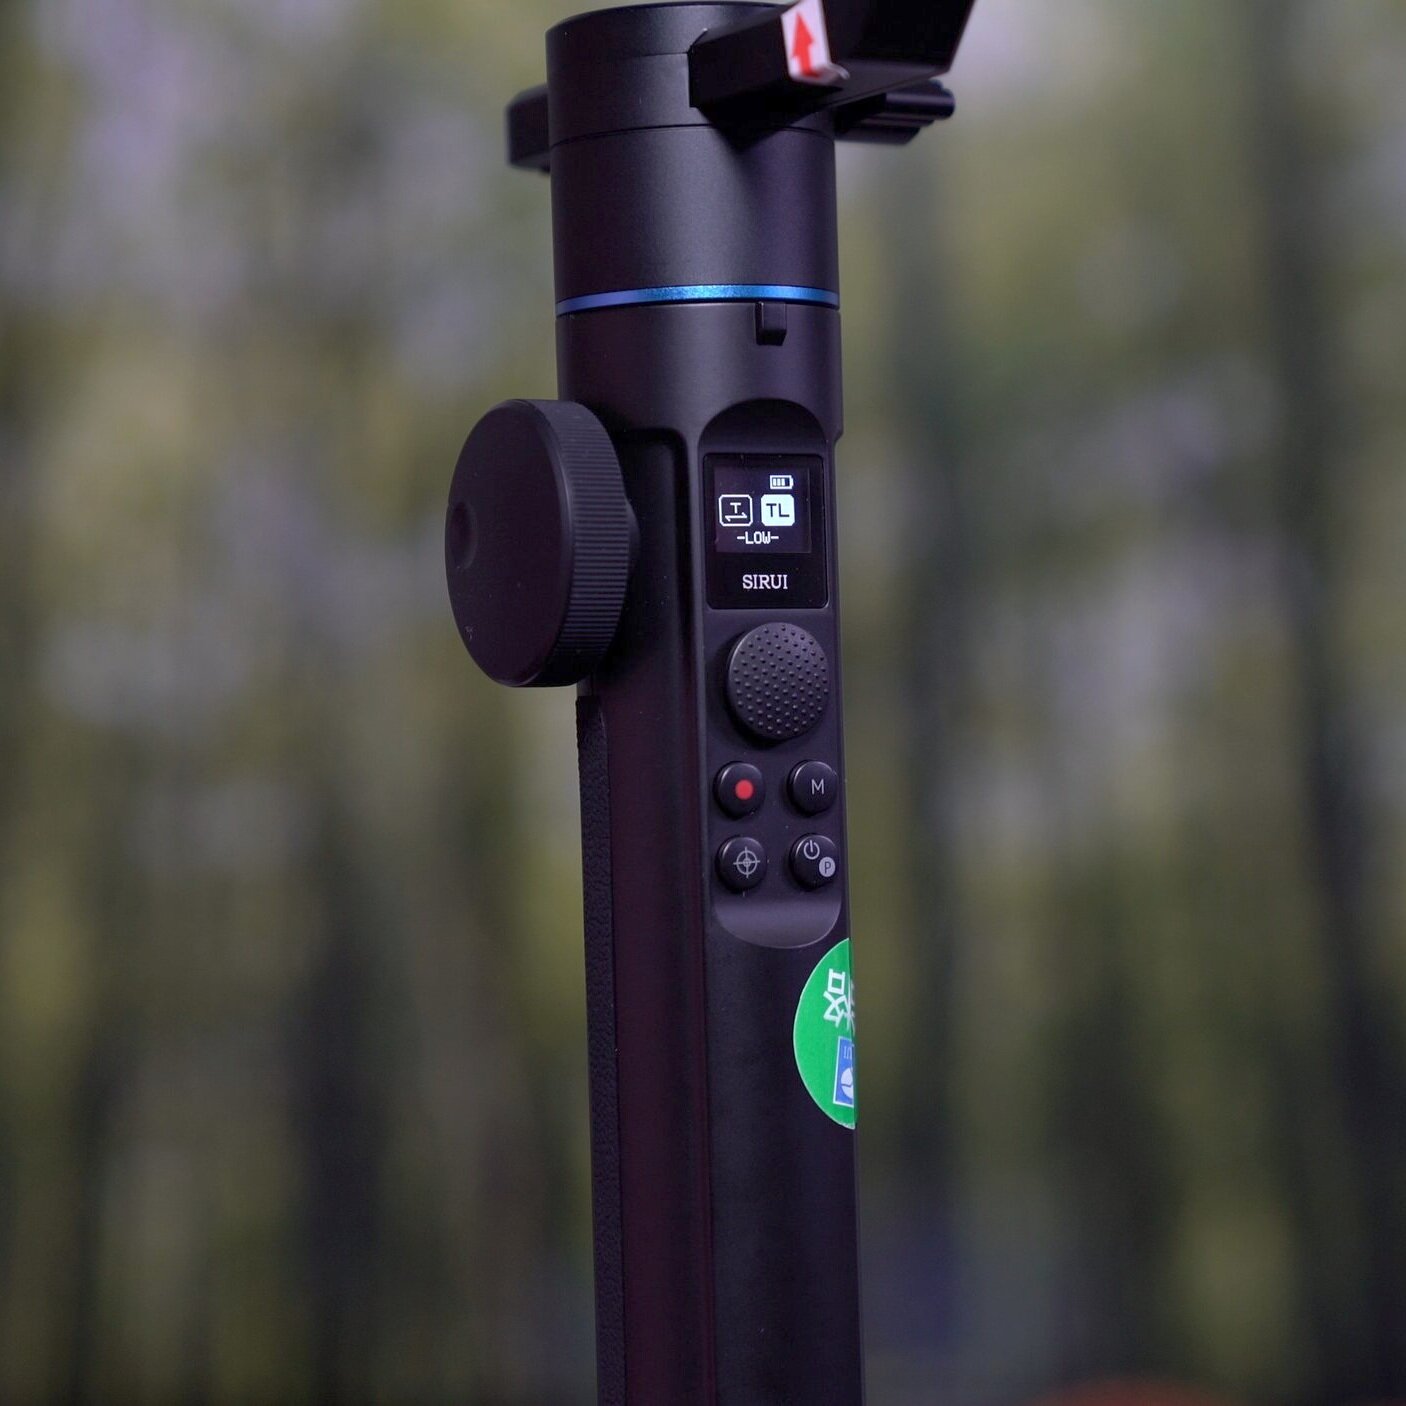
Looking at the handle, we get a nice display that shows the bluetooth connection status, battery life and current modes/settings.

Under the display is a joystick which allows for the manual control of panning and tilting of the gimbal along with some function buttons.

Of these function buttons, we first have the shutter button which is pretty self explanatory. It activates the shutter and takes photos or start/stops recordings.

Next is the mode button which switches between the various gimbal modes. With the P1, we get Tilting-Following Locked mode which locks the tilt motor while allowing use of the roll and pan. Next is Tilting-Following mode which is the same as the previous but now also unlocks the tilt motor to allow for complete freedom of movement. Third is the Triaxial Tracking Locked mode which locks all motors to the current orientation. Last is POV or Roll Follow Mode. This basically tilts the camera carriage up in preparation for inception or vortex mode.

ASSASSIN_S005_S001_T012.jpg

Moving on, we have the Focus Button. When connected to a compatible camera, this allows you to activate autofocus.

Lastly, we have the Power Switch button which not only turns the gimbal on/off but also doubles as the Motor Force Switch. If you double-tap this button, you’re able to select between 3 power settings of motor strength: low, medium and high. At the moment there’s no information as to what each setting is good for so you’ll just have to play with it to find the best setting for your camera setup.

On the side of the gimbal is the Auxiliary Wheel Dial. This allows you to adjust various things based on the mode that it’s in. Aside from spinning the wheel, you can also press it to cycle through its modes. Based on my experience with the Swift M1, I would assume that this first mode allows you to zoom in/out and set manual focus but it currently doesn’t do anything, at least not for me. With this wheel, we are also able to pan and tilt the gimbal.

ASSASSIN_S005_S001_T017.jpg

Moving to the back of the handle, we have the last of the physical buttons. This is a rocker style switch with two separate buttons, one on top and the other below. Pressing the top button activates sport mode where the motors become more powerful and allows for the gimbal to move faster than normal. This is useful for doing things like whip pans or just tracking a fast moving subject. The bottom button acts as a hotkey to activate Tilt Follow mode in all modes except when the gimbal is already in Tilt Follow mode. In which case, the bottom button activates Lock Mode. Double tapping the bottom button resets the gimbal’s parameters.

And that is basically all of the functions of the Sirui Swift P1, at least for now. Again I received a pre-production unit so it’s currently lacking some features but I have no doubts that after a few firmware updates, everything will be ready to go when this gimbal ships to consumers.

So far, this seems to be a pretty decent gimbal. It does what it's supposed to and has everything that I need for my personal work. Also, at the price of $200, it is also cheaper than some of the competition so that will be a big draw for this device.


UPDATE

After receiving a PDF of the Swift P1's manual, I'd like to amend some of the information expressed above.

  1. The packaging/accessories that I received are not those that consumers will receive when the P1 actually ships. My pre-production unit was shipped prior to when the official packaging was finalized.

  2. The Auxiliary Wheel Dial's first mode is Zoom mode. It does not adjust zoom and focus as stated, just zoom.

  3. The Motor Force Switch's 3 motor levels are as follows: "high force movement for heavier cameras, medium for mirrorless cameras small or general in size, low level for card cameras. Lower the force movement level if the Gimbal with the equipment attached vibrates when powering up. Increase the motor force to improve stability."


If you’d like to learn how to balance/setup the Sirui Swift P1, check out this video!


Want to support my work?

Consider visiting the shop and buying "Absolutely Nothing"
https://www.HaiHoangTran.com/shop/absolutely-nothing

or

Become a Patron!
https://www.patreon.com/HaiHoangTran

or

PayPal
https://www.PayPal.me/HaiHoangTran

APS iArmor Running Boards IA20SJE8B for Toyota Tacoma

After a lot of frustration with my Tyger Star Armor Side Steps, I decided to take them off and it was time for something new. Well, my new running boards have officially arrived and they are the APS (Auto Parts Specialists) iArmor.

It should be noted that some places list the manufacturer as APG. I can’t confirm if the APG running boards are the same as the APS but from images, they do like indistinguishable.

Installation of these running boards is very simple. If you go under the car near the door’s edge, you’ll see that there are some plastic screws. These are simply covers for the running boards’ mounting locations. Just take them off and you’ll be ready to install the running boards. There are 6 covers per side. The iArmor running boards come in three main pieces, two that make up the brackets that attach to the truck and the running boards that attach to the brackets. Three brackets attach to either side of the truck and each bracket is labeled to indicate its position on the truck. These are the first things to install. Each bracket is held in place with two sets of bolts that are provided. I would suggest 2 things while installing these brackets: use a rubber washer between the truck and the bracket to prevent damage from vibrations and to use threadlocker to prevent the bolts from loosening over time. Once you get the 3 brackets in place, it’s time to mount the running boards. Just align the running boards to the previously mounted brackets and clamp everything in place with the either half of the bracket and provided bolts. Once all 6 bolts are tightened, you’re done with one side and just repeat on the other.

I went with the APS iArmor running boards for a few reasons. First, they look pretty mean. At first, I wasn’t sure about the square tubing and sharp line design because the Tacoma doesn’t really feature any of these things. The Tacoma has a very round body shape. But I have to say, these running boards look very good. I was especially attracted to the way that the parts of these running boards are flushed against each other. Everything is streamline with few noticeable welds. This gives the iArmor a clean look.

Another thing that I like about these running boards is that they made out of aircraft grade aluminum. The manufacturer claims that the material corrosion proof which is great. I shouldn’t have to worry about the boards for a long time. Another benefit to using aluminum is the weight. These things are very light weight. One person can lift and install them with little hassle. Less weight also means that there is less that the truck has to haul around and this equates to better fuel economy. But in this case, less weight does not mean that the boards are less functional because they still have a weight capacity of 300 lbs.

One thing that I like about side steps, in general, is their potential to protect your vehicle from adjacent vehicles while parked. If you have a wide enough side step, it’ll stick out a decent way from your doors and if someone were to open their door, there’s a chance that they’ll hit the side step and this will prevent damage on the finish. The iArmor running boards are 6.5” wide so they should provide some form of protection.

I’d like to point out a few things about these running boards for those who are interested in picking them up. First, I don’t think that they are a good choice for those who need something lower to step on because they can’t get into the truck. These running boards sit about an inch lower than the rocker panel so they don’t make much of a difference. They are going to be best for those who want a larger surface area to step on to help them get in the truck, but these people will need to have the ability to get into the truck in the first place.

Another thing that I’d like to point out is the potential low quality of the running boards. Prior to buying, I read a few reviews that mentioned that the hardware that came with the boards (nuts and bolts) actually rusted over time. One person noticing rust within weeks. That’s quite concerning considering that the boards mount to the outside of the truck and it’ll no doubt experience some water. I don’t know the validity of these claims but I’ll be able to see for myself pretty soon. It’s rainy season here in Washington so my iArmor running boards will be exposed to a lot of rain. I’ll be keeping an eye on all of the hardware on these running boards over the next few days, weeks and so on. The bolts that I’m most worried about are the ones that mount directly into the truck because if those rust, they’ll spread into the body and that will be no good at all. From what I’m seeing, it seems like only the running boards themselves are made from the aircraft grade aluminum and everything holding it in place is spray painted steel so they all have the potential to rust. We’ll just have to see how the running boards perform in the long run.

For me though, the most disappointing thing about these running boards is general quality control. The boards that I have mounted to my truck is not the first set that I’ve ordered but the the second. The first set arrived damaged because of the way that they were shipped. Both boards are put in a box wrapped by a plastic bag with no extra form of protection. While in transit, the boards rub and bang against each other causing scuffs, scratches and even paint chips. Sending the first set back and getting the second set didn’t solve anything because the second set had the same issues. This is a problem from the factory because they don’t take the proper measure to package the running boards for shipment. So, if you’re the type to really care about minute details, these are not the boards for you. Look somewhere else.

To be honest, I would’ve returned these running boards had I not been offered a decent partial refund to cover the damages. For the price that I got them for, it was worth keeping but knowing what I know now and if I had to pay full price, I wouldn’t buy them. They look good, but the likelihood of receiving a damaged product and potential for rust is not worth the long term headache. Again, for the price that I paid, I can go buy a can of spray paint and make sure that all surfaces are covered and protected. You just have to figure out if that’s something that you potentially want to deal with.


If you're considering on buying any of the products mentioned, please support my work by using the links below.

APS iArmor Running Boards
Toyota Tacoma Double Cab https://amzn.to/2ODjZpk
Toyota Tacoma Access Cab
https://amzn.to/2mSbgnq
https://amzn.to/2lfBn77
https://amzn.to/2lfWd6m
For other vehicles https://amzn.to/2MqQVi0


Want to support my work?

Consider visiting the shop and buying "Absolutely Nothing"
https://www.HaiHoangTran.com/shop/absolutely-nothing

or

Become a Patron!
https://www.patreon.com/HaiHoangTran

or

PayPal
https://www.PayPal.me/HaiHoangTran

Sirui Swift M1 ... BE CAREFUL

I was very excited to bring you this post because I was recently sent the Sirui Swift M1, a new mobile gimbal soon to be released. As far as I know, I’m the first to really showcase this gimbal and it seemed very promising based on the marketing that I’ve seen. Unfortunately, getting hands on time with this device proved otherwise. Within minutes of unboxing, I ran into some issues that has entirely made me give up on this device and at this point, I have to say that I cannot recommend the Sirui Swift M1.

Let’s first talk about the design. In my opinion, the Swift M1 is just poorly designed. This gimbal utilizes a folding design to save on space when not in use. The folding design is one that a few other newer mobile gimbals have employed but if you look at those, they are much simpler. Those gimbals usually feature something like the phone mount section folding over the handle. With the M1, we have something similar but with multiple points of articulation and multiple places to fold. In practice, this makes the gimbal more difficult to fold down. Sure, once you understand how everything works and get used to the procedure, folding the gimbal becomes easier, but in my opinion, it never feels right. The gimbal is primarily made of plastic and after a few folds, I actually noticed some black dust that resulted from the plastic parts rubbing against each other. The plastic was essentially being shaved off as I locked/unlocked the gimbal. Also, with the force needed to lock/unlock some of the points, it just feels like I’m eventually going to break something.

Maybe this won’t happen and I hope that it doesn’t, but there’s another problem with the folding procedure. With the way that it’s situated, I can almost guarantee you that there will be damage to the gimbal handle purely from the folding and unfolding the gimbal. This is mainly because of the phone holder on the gimbal. It wraps around the handle and when the points are unlocked/unfolded, the phone mount hits against the handle, causing damage. Literally after my first attempt at unfolding my M1, the handle was left with some very noticeable scratches.

There is really nothing that I enjoy about the Swift M1’s folding design. It’s fiddly and just doesn’t work very well. It’s main purpose is to save space but because I dislike the folding procedure so much, I just leave the gimbal unfolded until I know that it’s going away for storage.

Different people may have different opinions on the folding design. Some may like it and think that I’m just being nitpicky and that’s fine. But there’s one thing that really ruined this gimbal for me. If you watch the video above and were paying attention, you’d notice that the OLED screen on the gimbal was on the entire time. This is not supposed to be so. It’s only supposed to be on when the gimbal is powered on and in use. My M1’s screen being on essentially tells you that it’s bricked. Although the screen is on, there’s no power to the gimbal’s motors as if it was off. The gimbal is stuck in some middle state that doesn’t allow me to do anything, not even restart it. The gimbal is essentially paperweight at the moment. This happened after updating the firmware. Like many other gimbals, you go in the app, click update firmware, it goes through the process and restarts the gimbal. Except with mine, it restarted the gimbal in the bricked state. So as of right now, my M1 is useless. The only idea that I have to try and fix it is to let the battery die and hopefully it’ll restart properly when charged back up. The main problem with this plan is, like I said, the gimbal is basically off and the only thing that’s on is the screen which draws little to no power. The gimbal has been on for days and the screen still shows a full charge so powering it down can possibly take weeks if not months, but that’s all that I can really do. I just have to wait it out.

I’m so glad that this product was sent to me for free because had I purchased it with my own money, I would be PISSED. Don’t get me wrong, aside from the folding design, this was actually a pretty good gimbal when it was working. It is feature rich and functioned like it should until the firmware update ruined everything. Because it’s a firmware issue, I have little doubts that this is something that Sirui can’t fix. Hopefully, when they see this, they’ll pull the bad firmware and update it before this happens to anyone else.

If you’re reading this and are interested in purchasing the Swift M1, I would recommend you to be careful. Realize that the folding design is finicky. It works but is definitely not the best implementation. You have to be one of those people who are ok with scratches or this is not the device for you. Also, DO NOT update the firmware unless you can get an absolute confirmation that it will not brick your gimbal. Make sure that the firmware has been fixed. Other than that, I hope the gimbal works out for you. Like I said, it functions pretty well and has a lot of cool features.


Want to support my work?

Consider visiting the shop and buying "Absolutely Nothing"
https://www.HaiHoangTran.com/shop/absolutely-nothing

or

Become a Patron!
https://www.patreon.com/HaiHoangTran

or

PayPal
https://www.PayPal.me/HaiHoangTran

FeiyuTech AK4500

When it comes to gimbals, there are a few brands that essentially dominate the market. This forces everyone else to really up their game and throw as much as they can at the consumer to try and make some sales. One of those brands is FeiyuTech and this, the new AK4500 embodies this motto.

If you’re new to FeiyuTech, the AK4500 is essentially an upgrade to the AK4000. I personally did not have a good experience with the AK4000 and publicly said that it was the worst gimbal that I’ve ever tried, but how is the AK4500?

AK4500SET_1400x.jpg

First off, the AK4500 comes with many of the same accessories as the AK4000. We get the follow focus, carbon fiber extension pole, tripod feet, along with a bunch of other minor things.

Looking at the handle, we see that the controls are the same. Same touchscreen, same joystick and same button layout. We have an updated multifunction knob but that’s not too big of a deal.

Turning on the gimbal, I did notice that there were a few updates to the firmware. First, the menu system looks a lot cleaner and easier to navigate. I find the settings to be pretty straightforward and easier to understand on a first look basis. Someone who’s used to electronic gimbals can pick the AK4500 up and get going pretty quickly. Even if you’ve never used a gimbal before, this menu makes it pretty easy to figure out the modes and settings.

However, it does seem like FeiyuTech is focusing more on the firmware side of things. It seems like they’ve added more features to the touchscreen’s firmware but have actually taken away some of the features of the physical buttons. With the AK4000, the mode button allows you to switch between panning and lock mode with a single tap. Double tap and the gimbal will switch to follow mode. Triple tap and it’ll enter all follow mode. The AK4500 only allows you to switch between panning and lock mode with the single tap and gets rid of the double and triple tap functions. With the AK4000, aside from turning the gimbal on/off by long pressing the power button, a single tap will enter rolling follow mode and triple tap will rotate the pan axis 180 degrees to enter selfie mode. The AK4500’s power button gets rid of all other functions and only allows you to turn the gimbal on/off. With the Ak4500’s missing features on the mode button, that’s really only a problem if you need to be on any other screen besides the default which allows you to switch between the modes with a single tap. However, as a vlogger, I’m really missing the selfie mode shortcut on the power button. I really hope FeiyuTech adds that back or give me another button to assign it to because activating it in the menu is a pain when you have to do it over and over again while vlogging throughout the day.

Aside from the firmware, there are some other nice upgrades with the AK4500.

The AK4500 can now support a maximum payload of 4.6kg, upgraded from the AK4000’s 4kg max payload. The difference may not seem that much on paper, but the more the merrier because I found that the AK4000 often times struggled with payloads nowhere near the advertised max payload. The AK4500’s stronger motors are going to make using larger camera setups much more enjoyable.

This gimbal now features a lock button on the three main axis. This means that you can individually lock the pan, tilt and roll axis. This feature is nice because it makes balancing a lot easier. Say you’re balancing the roll axis and the other axis aren’t balanced and they’re moving around everywhere, well now you can just lock them down and focus on the roll axis. This feature also makes traveling with the AK4500 much easier than other gimbals. Being able to lock these axis down means that when you’re moving around with the gimbal, the upper section of the gimbal and your camera isn’t shifting around as you move. This is a simple feature but has become a must for me because it is so useful.

Another big update with the AK4500 is the quick release plate system used to mount and dismount a camera. This is now more of a double quick release system because it utilizes two different plates. There is a longer bottom plate that attaches to the gimbal and it is Manfrotto compatible. The shorter plate attaches to the camera and that one is Arca Swiss compatible. The idea behind this is that when you get everything balanced out, you can still quickly and easily remove the camera without having to rebalance after putting it back on. The longer plate that attaches to the gimbal is the one that adjusts your balance while the smaller plate is strictly used to mount the camera to the longer plate and gimbal so it doesn’t have an effect on balance. This is a pretty smart system and works pretty well. The only drawback is that you’re essentially locked into using the smaller plate that comes with the AK4500. You have to be committed to this plate and Arca Swiss or you’ll have to install another quick release plate system if you want to use another plate or just switch the plates on and off.

Perhaps the most notable addition to the AK4500 is this new handle which FeiyuTech calls the Hyperlink Controller. You can attach the handle to the gimbal for a more comfortable carry during underslung mode or you can take it off completely and use it as a wireless controller. The handle allows for mode changes and adjustments of the gimbal either via the joystick or just by moving the handle around. This can be extremely useful in many situations. One would be when there are multiple camera operators. This handle allows for one person to control and focus on moving the gimbal around an area while another person can focus on adjusting the gimbal’s parameters. This accessory opens up a whole new world of possibility and just a few years ago, something like this would cost us thousands of dollars to achieve. To have it here in this package is simply amazing.

This brings me to the price. The FeiyuTech AK4500 retails for $749. That’s not exactly cheap, but it is competitive. Considering all the accessories that you get and the capabilities of this gimbal, it is hard to overlook. Like I said earlier, to compete FeiyuTech has essentially thrown everything at us in terms of features and I would have to say that it worked. The AK4500 as a whole is a very compelling package and one worth checking out.


If you're considering on buying any of the products mentioned, please support my work by using the links below.

FeiyuTech AK4500 https://amzn.to/2lfsXN5

FeiyuTech AK4000 https://amzn.to/2lfPpWp


Want to support my work?

Consider visiting the shop and buying "Absolutely Nothing"
https://www.HaiHoangTran.com/shop/absolutely-nothing

or

Become a Patron!
https://www.patreon.com/HaiHoangTran

or

PayPal
https://www.PayPal.me/HaiHoangTran

NEVER Buying from Robert Larson Toyota of Tacoma Again

I recently purchased a 2019 Toyota Tacoma from Robert Larson Toyota of Tacoma in Lakewood, WA. At the time, everything seemed like sunshine and rainbows but today, I’d like to share with you the story of how purchasing my dream truck turned out to be possibly the worst buying experience that I’ve ever had and how I was scammed by this dealership.

Let’s start from the beginning. I had just purchased a 2019 Toyota Corolla Hatchback from this dealership and felt that I was in the position to buy another vehicle. I wanted to buy my favorite truck and that is the Toyota Tacoma. So, I returned the following day and went through with buying it. The overall purchasing experience was not bad. Everything went through, I purchased the truck and thought that it was all good.

After purchase, things started to slowly fall apart and issues came to light. The first thing was the condition of the truck at delivery. It had this dirt and gunk all over the body. From what I was told, new vehicles arrive with a protective wrap that is removed at the dealership. When left over time, the wrap develops dirt along the edges and that’s what it was that I was seeing. So they took the truck back and “detailed” it again only for some spots to be overlooked and there to still be gunk on the truck. I was told to not worry about it because when I bring my car in for Cilajet, the technician would have to completely detail the truck and all of the gunk would be gone.

At this point, I have to step back and talk about Cilajet. In short, this is a paint sealant. The manufacturer, of course, makes a lot of claims about their product and how amazing it is. I never heard about Cilajet prior to buying the Corolla and the Tacoma. I’m one of those people who don’t believe in extended warranties. I buy the vehicle, gamble with what I get and usually that works out. But surprisingly, because this is my dream truck and I intend to keep it until it breaks down, I bought all the important extended warranties. I bought a warranty to protect the mechanical components. I bought a warranty to cover the tires, keys, dents and dings. I bought a warranty to cover all the electrical because a lot of the truck is electronically controlled. I was worried that I wouldn’t be able to fix the truck myself if something were to happen so better to be safe than sorry. I essentially bought all the warranties to cover the internals of the vehicle. At this point, all there was left is the to cover the cosmetics. This is how I was sold on Cilajet. When I was in the financing office, I was told that if I got Cilajet, the entire truck would be protected from scratches. As in, if I got a scratch for ANY reason, even if someone comes up and keys the truck, Toyota would take it in and fix the issue. I made sure that this was the case before buying and made sure that multiple people heard what was being promised. I wanted my truck to be protected from scratches. I was assured that this is so, so I purchased the Cilajet. Well, shortly after contacting Cilajet itself, I found out that this isn’t true. Cilajet will cover nothing near that. It’s a paint sealant so it’ll cover defects that relate to that subject. You can do your own research but just know that they don’t cover scratches like what I was looking for and was told. So, that was the first major red flag. Funny enough, when I purchased all of these warranties, I was told that if I ended up not wanting them, I can come back any time and get a pro-rated refund. Well, can you guess what was non-refundable? Cilajet.

Another issue that I had with the Cilajet was that it wasn’t applied properly. I’m no expert on this but from what I’ve seen, it’s applied like a wax. You put it on the paint and buff it in. Remember earlier when I told you about how there was gunk from the protective wrap on my car and how it was supposed to be cleaned when I got the Cilajet applied? The gunk turned out to be an indicator of the poor application of Cilajet. I was looking at the car after Cilajet was applied and remnants fo the gunk was still there. This shows that the Cilajet wasn’t thoroughly applied. I had to schedule for reapplication but I think that they just redid the spot that I showed them, the spot where the gunk was because the first time around, application took 4 hours. This time along with other services, it took less than 2 hours. I have my doubts about what was actually done. Since I paid for it, I would love to have the Cilajet properly installed but again it has to be buffed into the finish. A car only has so much clear coat. I don’t want them to keep going at my finish especially when I don’t know what’s actually done since the technician can’t get it right. As far as the Cilajet, it is what it is. I took a major loss by paying the hundreds for it and I can’t do anything about it now. But the problems don’t stop there.

b.jpg

I was checking out the Tacoma and noticed something weird. My driver window wouldn’t fully go up. It was siting just below the weather stripping and there was a noticeable gap. When I touched the window’s glass, it was actually loose. It shifted around easily. I checked the other windows and this wasn’t happening anywhere else. This is concerning because I’m in Washington. This state is known for the rain and having a window that doesn’t close all the way isn’t exactly what you want. There was actually a big thunderstorm the night that I noticed the gap and I had to tape the window up. Imagine that, taping up the window of a car you just bought.

After noticing this, I began to really inspect the car. I removed the front bumper license plate bracket and noticed that it was hiding a deep gouge in the bumper. I went under the frame and more gouges and even surface rust. SURFACE RUST ON A BRAND NEW TRUCK?!?! ON THE FRAME!!!

A.jpeg
A.jpg

Let me also point out that the truck only has about 100 miles on it. 50 of which was before I even bought it, from other test drivers. Even in the 50 miles that I’ve put on it, I’ve had to go back and forth from the dealership about 7 times to deal with all the issues so I’ve only done about 20 miles worth of personal driving. Can you imagine having these kind of issues when you’ve only had a car for 20 miles?

At this point, I was done. I took the truck to the dealership and showed them the problems. They scheduled me for the next day. The window was fixed and the minor Cilajet reapplication was done. I asked about the frame and the bumper. Well, it turns out that this truck was a dealer trade. This means that they got the truck from another dealership to sell. When Toyota of Tacoma got the truck, they didn’t do an exception on it like they were supposed to. I assume that they just looked at it, said yeah it’s a new truck, its good for sale. They sold it to the next person that wanted it and that just happened to be me. They admit that they didn’t do an inspection, but said that nothing can be proven about the damages. They can’t prove that the other dealership cause the damage, the can’t prove that it was damaged at their dealership and they can’t prove that I didn’t cause the damage after purchase. I can understand this train of thought, but had Toyota of Tacoma actually inspected the vehicle, we would know where the damages came from and under who’s ownership. At the end of the day, because they didn’t do a proper inspection, like they are supposed to, they didn’t know about the damages so they couldn’t tell me about it. I bought this truck without knowing it’s actual condition and because of the dealership’s mistake, I’m paying for it. I now have to get the rust removed and treated. I now have to deal with a damaged bumper. Now, instead of looking at the Tacoma and being happy that I got my dream truck, I see it as a reminder to never buy from Robert Larson Toyota of Tacoma again.


IMG_1691.jpg

There’s something else that I wanted to mention that didn’t fit into the timeline of the story above, so here it goes.

When I purchased the Tacoma, I got in the transaction a genuine Toyota bed mat. They didn’t have the mat in stock so ordered one in. It arrived and had chunks missing. It was as if something scraped really hard against it and took pieces out. I requested an exchange and they ordered another in.

The second mat arrived in even worse condition. Between the rubber layers of the mat are metal cords. The second mat was so damaged that the cords were visible in many locations. This is a problem because the cords could damage whatever you put on the mat. I requested for another exchange and the parts representative told me that “I can exchange it but I don’t know if it’ll be any better”. When I heard this, I was just amazed by the response. I was amazed that the quality control of this product was so bad that the rep didn’t think that it could get better than a mat that had the metal cords exposed.

Nevertheless, I wanted to see for myself so they ordered in a third mat. At this point, I told myself that I’m just going to take it no matter what. Well, it’s definitely not perfect. The third mat arrived with a bunch of discoloration and stains. It was a mess, but I took it. The dealership was obviously not going to take care of me.

It should also be noted that with all of these mats, the dealership never bothers to contact me when the mats arrive. I had to call back everyday and ask if the mat was available.

In hindsight, these experiences should’ve been a red flag and an indicator of the quality of service to come.


Want to support my work?

Consider visiting the shop and buying "Absolutely Nothing"
https://www.HaiHoangTran.com/shop/absolutely-nothing

or

Become a Patron!
https://www.patreon.com/HaiHoangTran

or

PayPal
https://www.PayPal.me/HaiHoangTran